Lessons, video and files
Everything a learner reads, watches or opens in a lesson is set up in the lesson editor. This page covers writing the lesson, adding video and documents, choosing when the lesson is available, and checking how it looks on a phone. Most tasks take a few minutes; uploading a long video takes as long as your connection needs.
Before you start
- You need to be signed in to the creator studio as a creator or an organisation admin.
- You need a course with at least one unit and one lesson — see Organise a course.
- Uploaded files count towards your plan's storage allowance. See pricing.
To open the lesson editor, go to the course's Curriculum and press the lesson's title. When you have made changes, press Save Changes at the bottom — you see "Saved successfully." Nothing in the editor is saved until you do.
Write the lesson
- Type the lesson's text in the Content section. The editor has the usual formatting tools, and shows the body's length as you write.
- Press Save Changes.
Let the AI assistant draft it
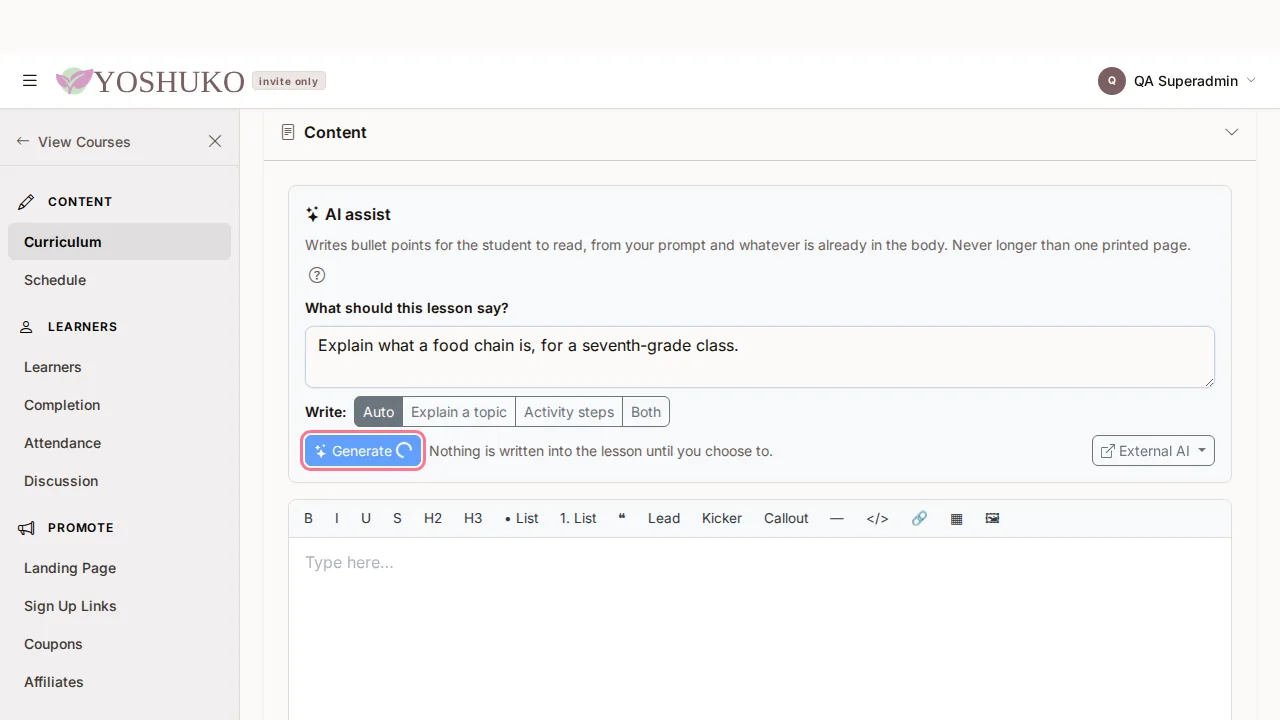
Above the editor, the assistant writes bullet points for the learner to read — never longer than one printed page, and never teacher notes or timings.
- Under What should this lesson say?, describe what you want, for example "Explain photosynthesis to a year 8 class, in six points".
- Choose what to write: Auto (the assistant decides), Explain a topic, Activity steps, or Both.
-
Press Generate. The draft appears under Suggestion.
-
Choose Insert at the cursor, Replace the body, or Discard.
- Press Save Changes to keep it.
Your prompt is sent together with the lesson title and whatever is already in the body. If you prefer another assistant, the External AI menu copies your prompt and opens ChatGPT, Claude, Copilot, Gemini or Grok.
Add a video, document or other exhibit
Exhibits are shown full-width above your written content. A lesson can have as many as you like; learners work through them as numbered steps, in the order you set.
- Open the Exhibits section.
-
Under Add an exhibit, choose a tab:
Tab What you add Video A Video URL from a supported video site. Hover the help icon to see which sites work. Press Add. Upload A video, audio file or document from your computer (Upload a file). Rich Media A Rich-media URL from a supported site, such as a CodePen. Press Add. PDF Upload PDF or image — a PDF up to 20 MB, or a PNG, JPEG, WebP or GIF image (images are converted to PNG). Google Doc A Google Doc URL. The document must be shared with "Anyone with the link". Press Import — it is saved as a PDF. 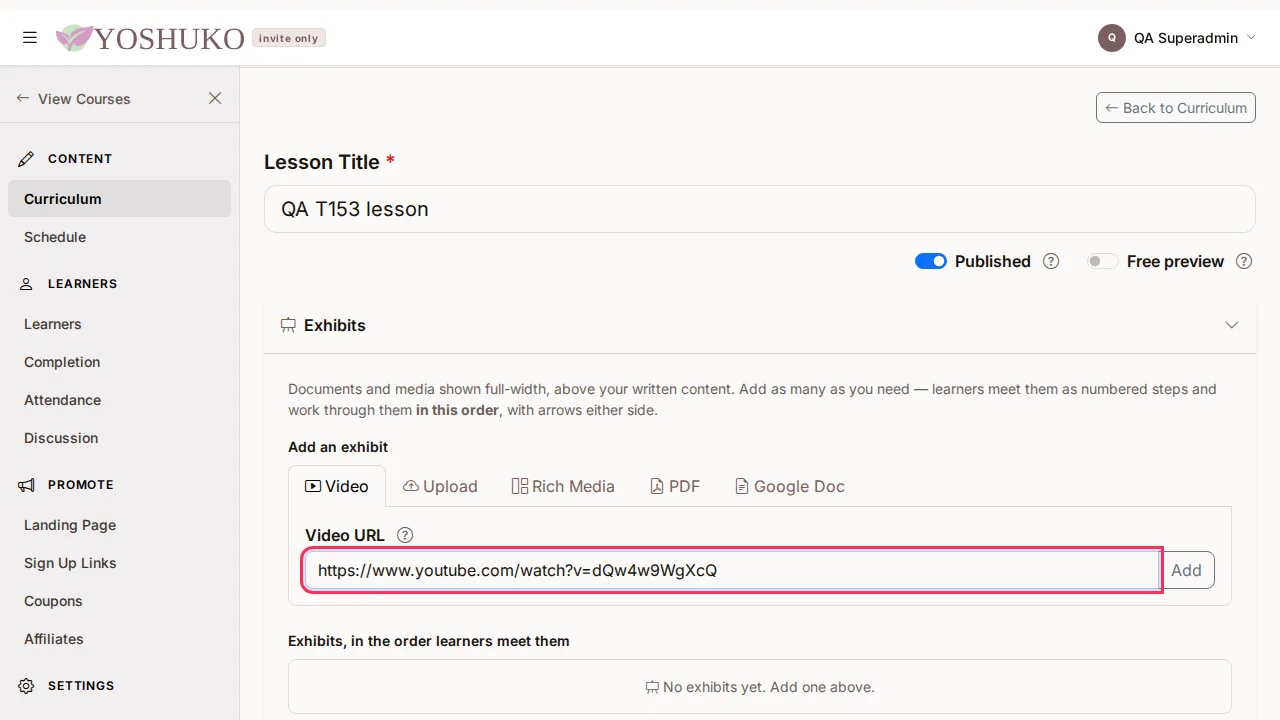
-
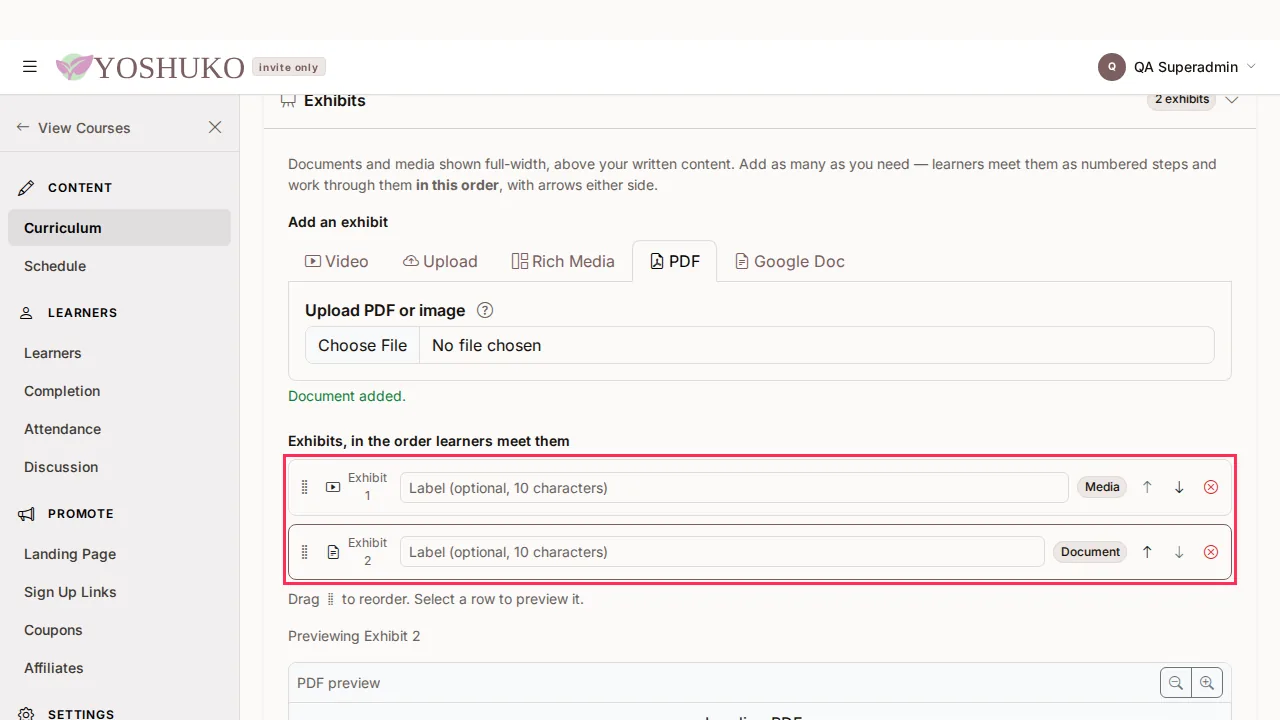
Each exhibit you add appears in the list Exhibits, in the order learners meet them.
- Press Save Changes.
Arrange and label exhibits
In the exhibit list, each row lets you:
- give it a short Label (optional, up to 10 characters), such as Lecture;
- change its place with Move earlier / Move later, or by dragging its grip;
- select it to see it in the preview;
- remove it with Remove this exhibit.
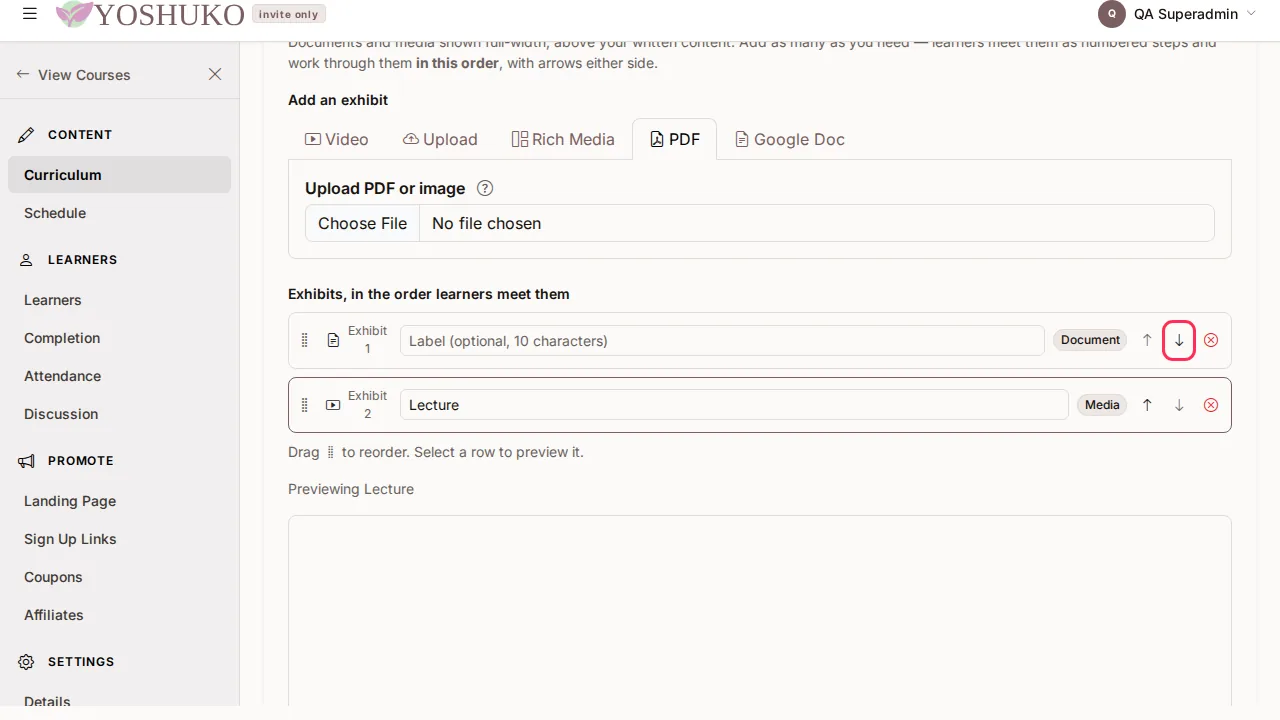
Press Save Changes — the order and labels are kept.
Upload a large video
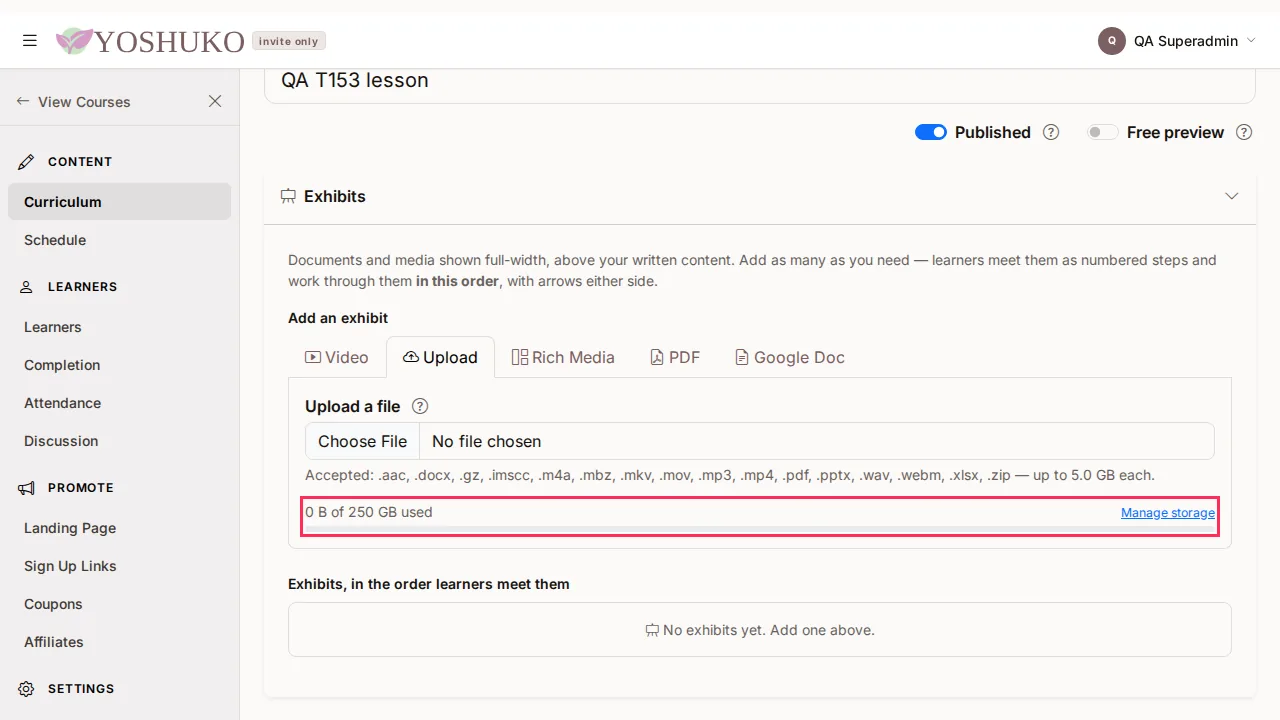
On the Upload tab you can see how much storage you have left before you choose a file. The file goes straight to storage without passing through the app, so a large video uploads at your connection's full speed.
-
Check the storage line under the upload box.
-
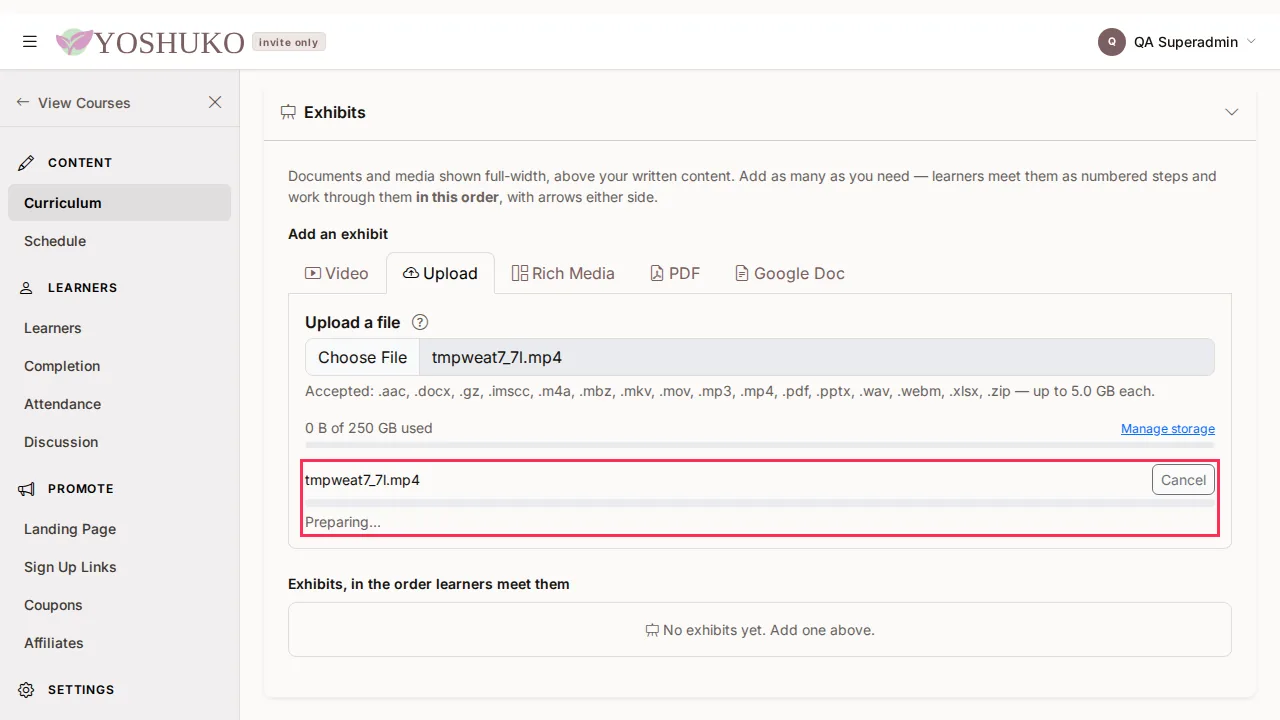
Choose the file under Upload a file. A progress bar shows the upload; Cancel stops it and releases the space it had reserved.
-
When it finishes, a preview appears. Press Save Changes.
Manage your storage
The Storage page (the Manage storage link under the upload box) shows what you have Used, what is Included with your plan, any Extra storage, and what is Remaining. It counts the video, audio and documents you upload to lessons — course images and text are not counted.
Free up space
- Under Your files, find the file you no longer need.
-
Press Delete, then Delete again to confirm ("Delete this file?").
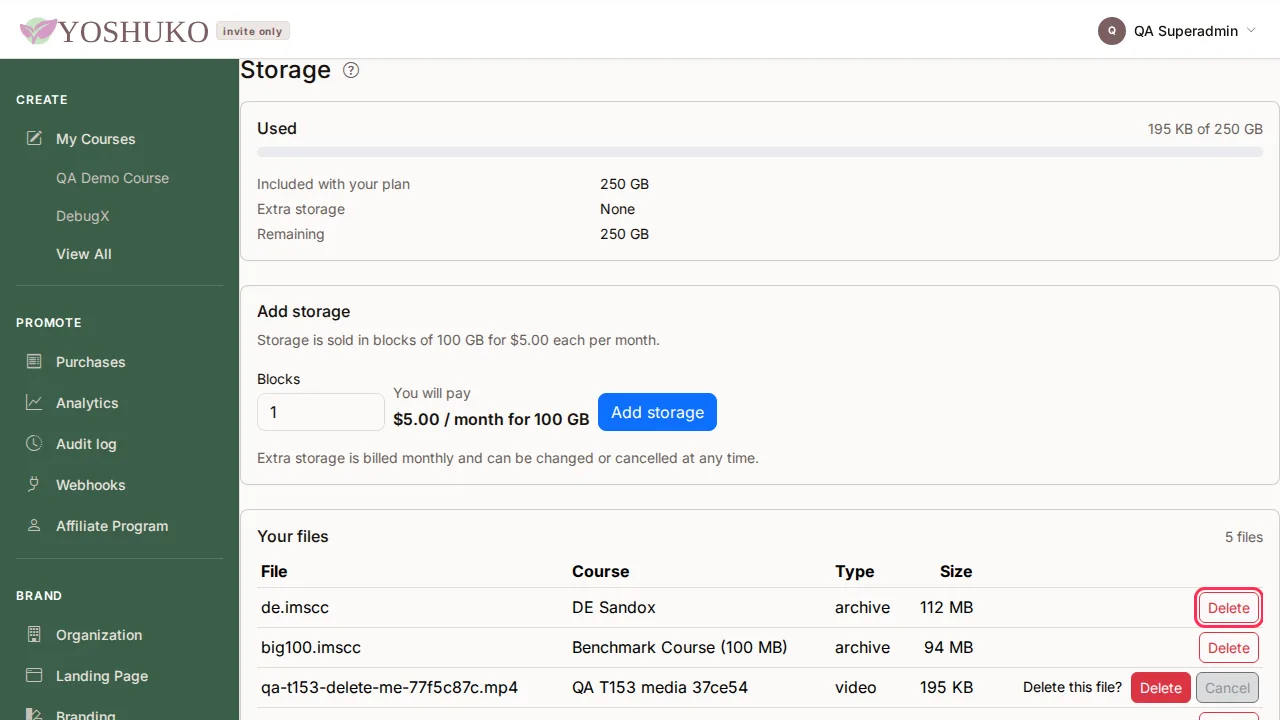
The space is freed immediately.
Buy more storage
If a file will not fit, the Upload tab says so and offers Add storage.
- Press Add storage.
-
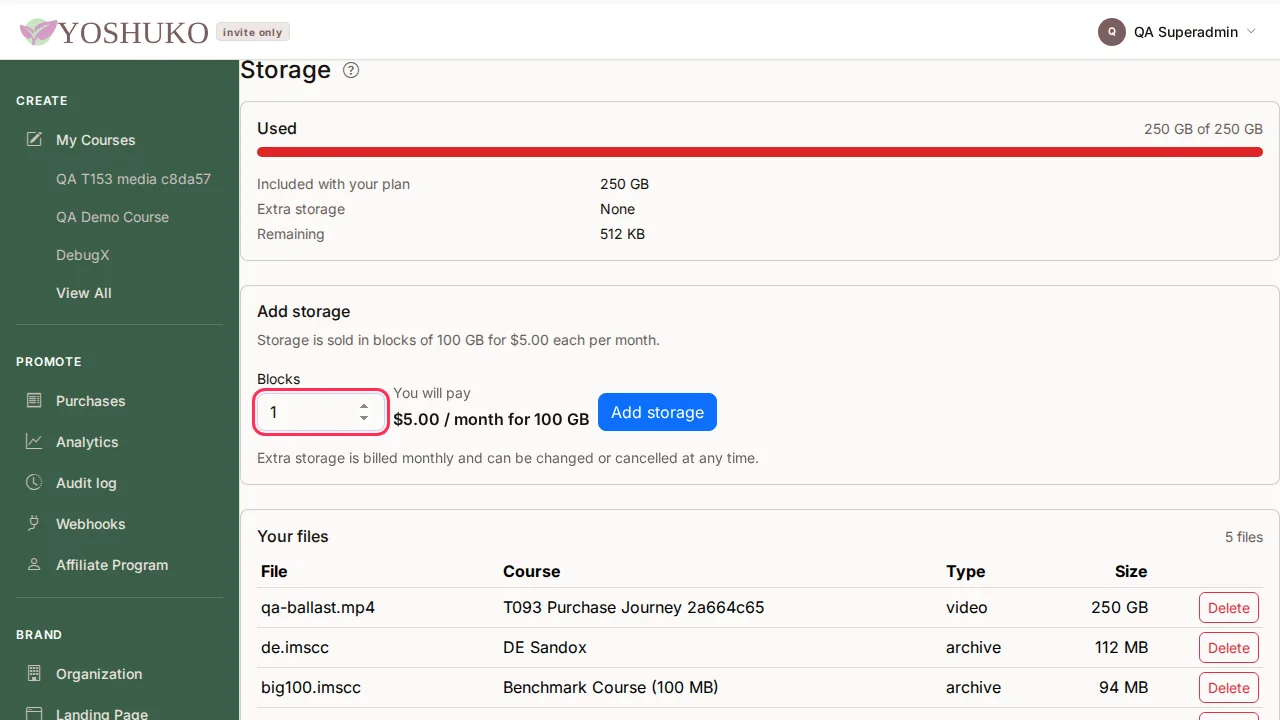
On the Storage page, choose how many Blocks to add. You will pay shows the total.
-
Press Add storage and complete the payment. You then see "Thanks — your storage is being added". The extra space appears once your payment is confirmed.
Offer a lesson as a free preview
Switch on Free preview at the top of the lesson editor and press Save Changes. Visitors who have not joined the course can then view this lesson for free — a good way to show what the course is like.
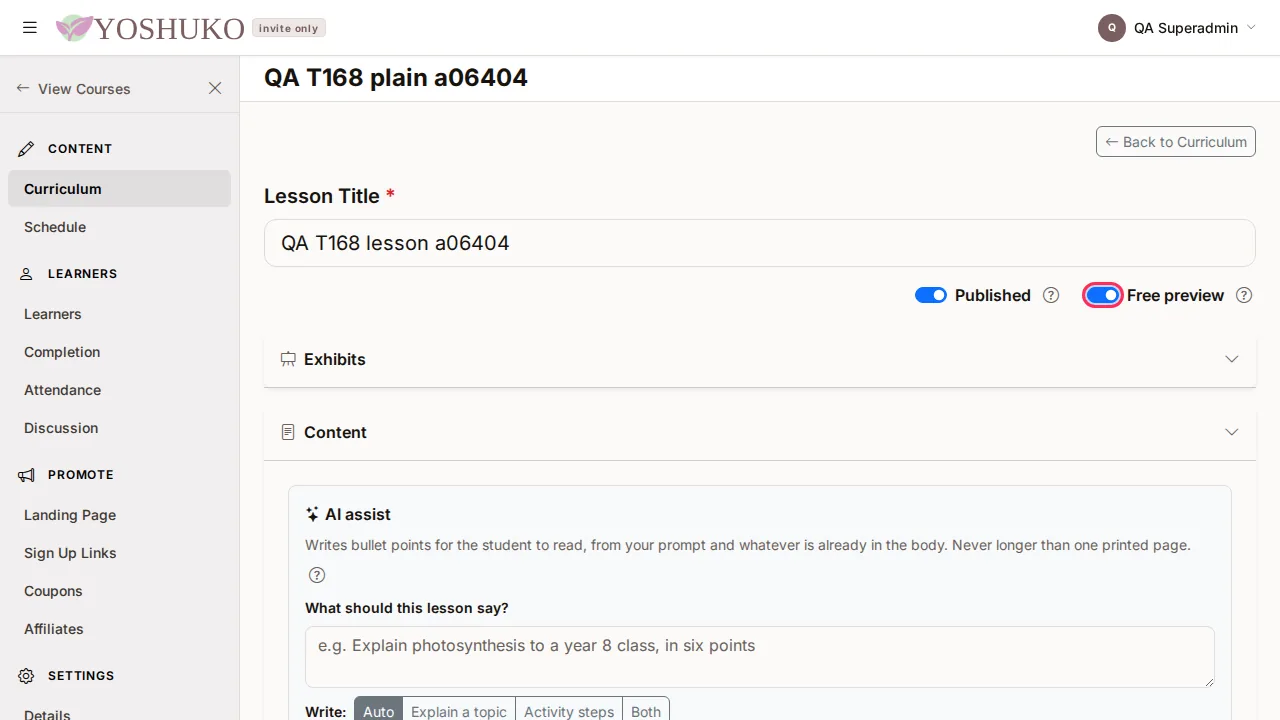
Published, next to it, controls whether enrolled learners can see the lesson (once its unit is published).
Choose when a lesson opens and closes
-
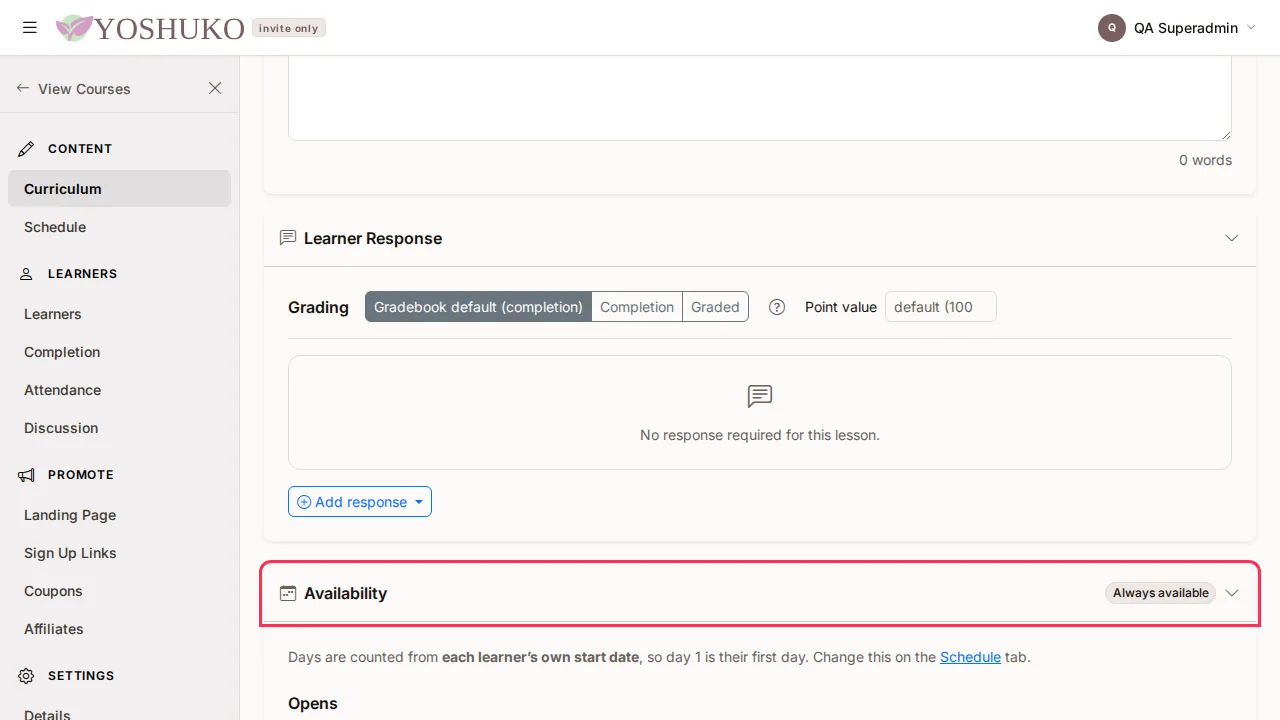
Open the Availability section of the lesson editor.
-
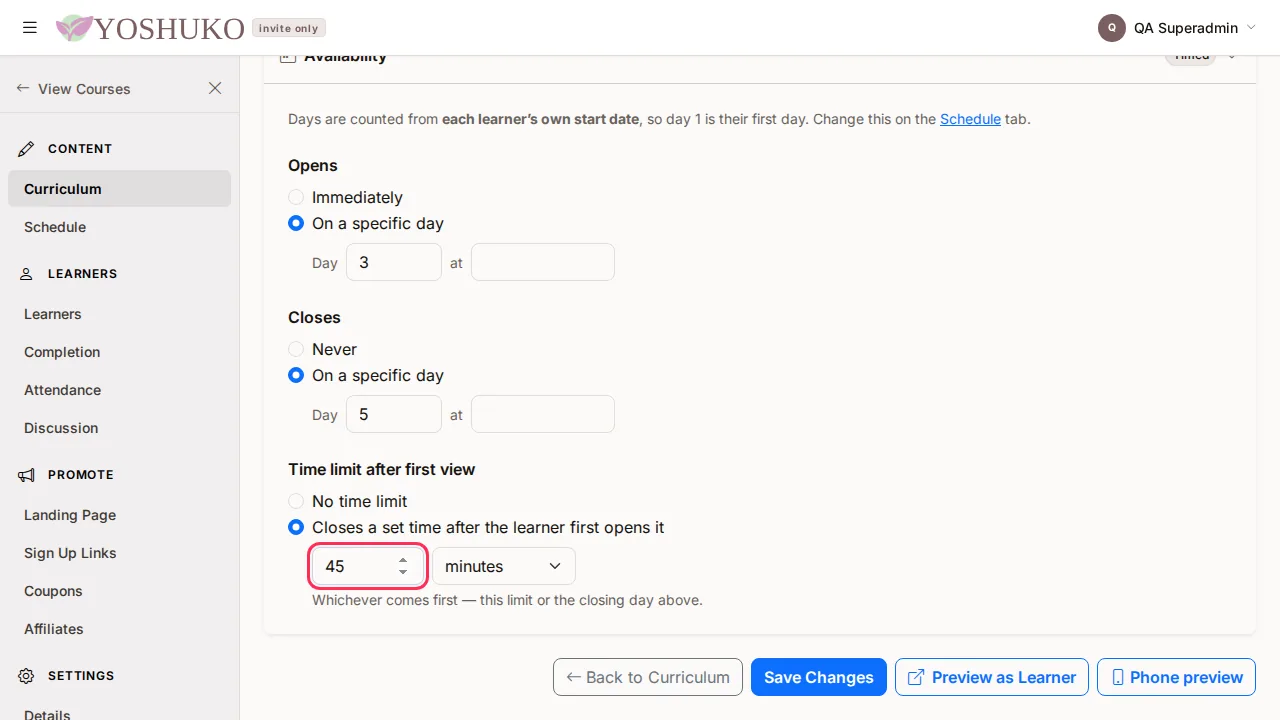
Under Opens, choose Immediately or On a specific day — then enter the Day (day 1 is the first day) and, if you like, a time.
- Under Closes, choose Never or On a specific day, with a day and time.
-
Under Time limit after first view, choose No time limit, or Closes a set time after the learner first opens it and enter an amount in minutes, hours or days.
-
Press Save Changes.
The time limit works alongside the opening and closing days: a lesson can open on day 10, close that evening, and give each learner 90 minutes once they start. How days are counted — from each learner's own start or from the course's start date — is set by the course's schedule, below.
See and change every lesson's dates at once
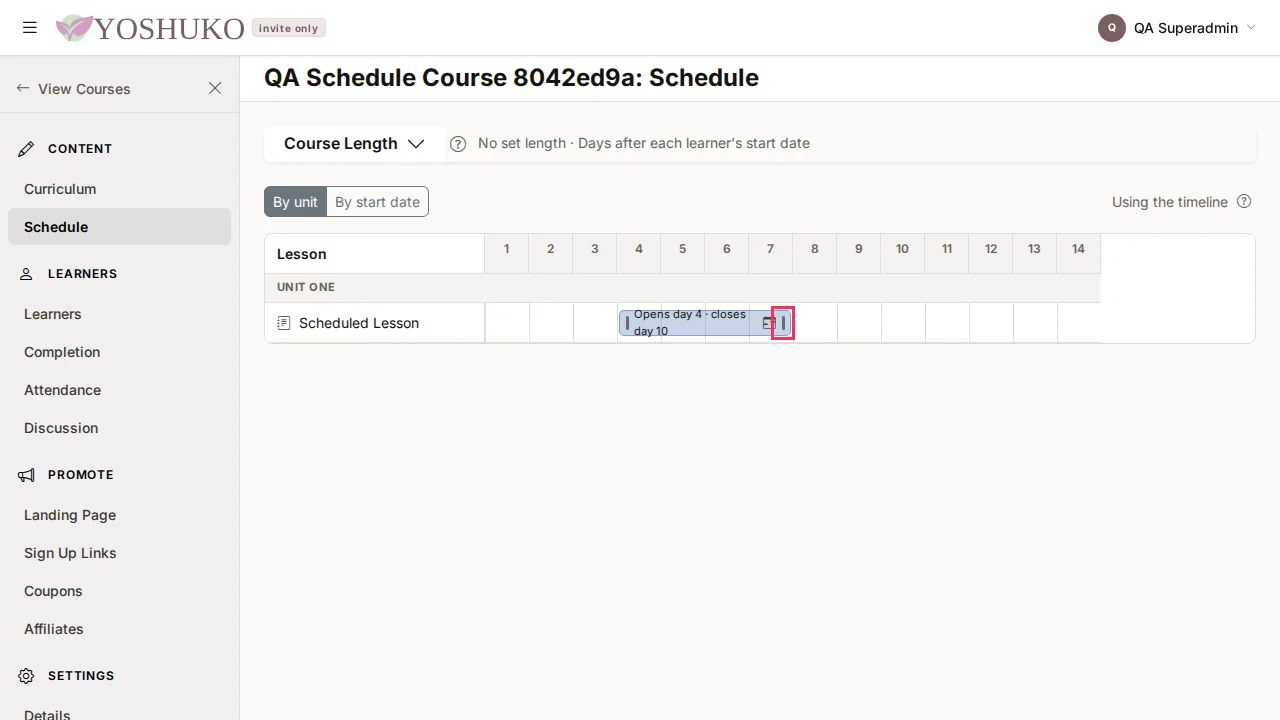
The course's Schedule page (row menu → Content → Schedule) shows every lesson on a timeline.
-
Drag either end of a lesson's bar to change when it opens or closes. The change is saved as soon as you let go.
-
Press a lesson's calendar icon (Availability options) to set its dates in a dialog, then Save availability.
- Sort the rows By unit or By start date.
- Select several lessons by pressing their titles (hold Ctrl or Cmd to add one, Shift to add a range), then open Selected Items and choose Adjust Open Dates… to move them together.
Preview the lesson on a phone
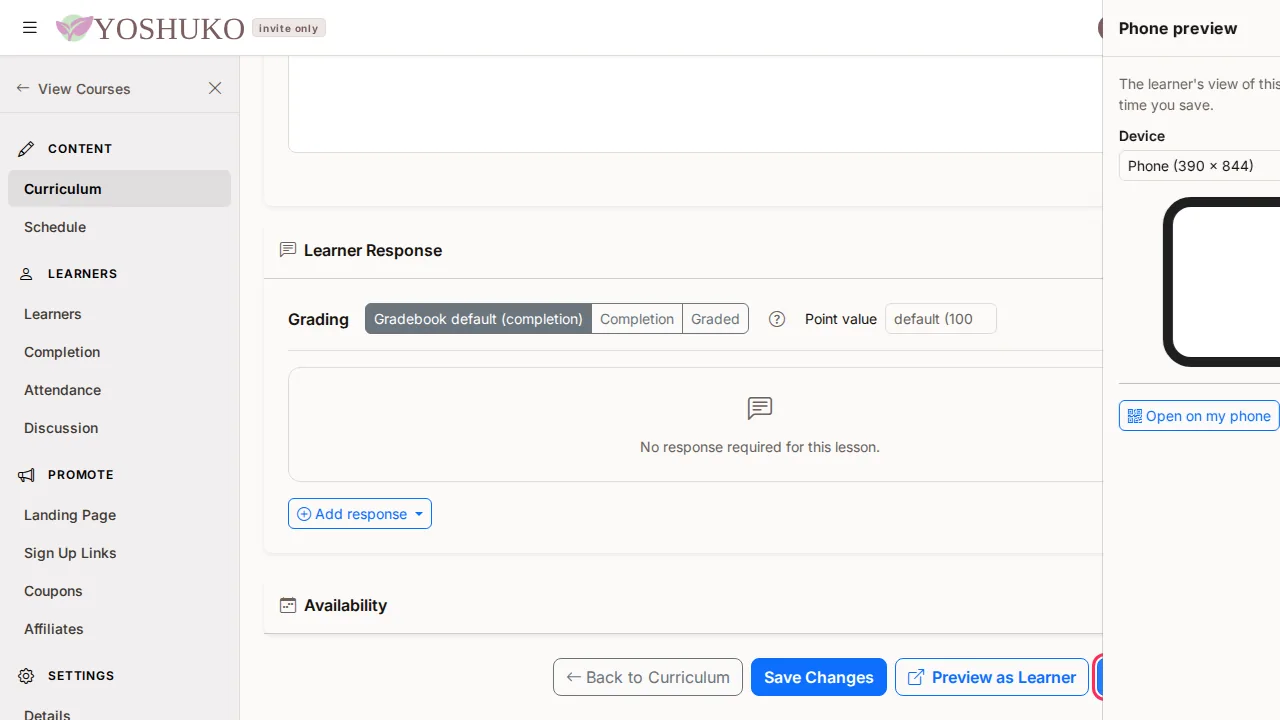
- Press Phone preview at the bottom of the editor. A panel opens beside the editor, showing the lesson as a learner sees it, as last saved. You can keep editing.
- Choose a Device: Phone (390 × 844), Small phone (360 × 740) or Tablet (820 × 1180).
- After you press Save Changes, the preview shows the saved version.
- To try it on your own phone, press Open on my phone, then scan the QR code or open the link shown.
- Close the panel with Close the phone preview.
Use your own picture for the course
The large image at the top of your course's landing page is its Hero image. Open the course's row menu, choose Landing Page (under Promote), and in the Hero image card:
- Choose the Upload tab.
-
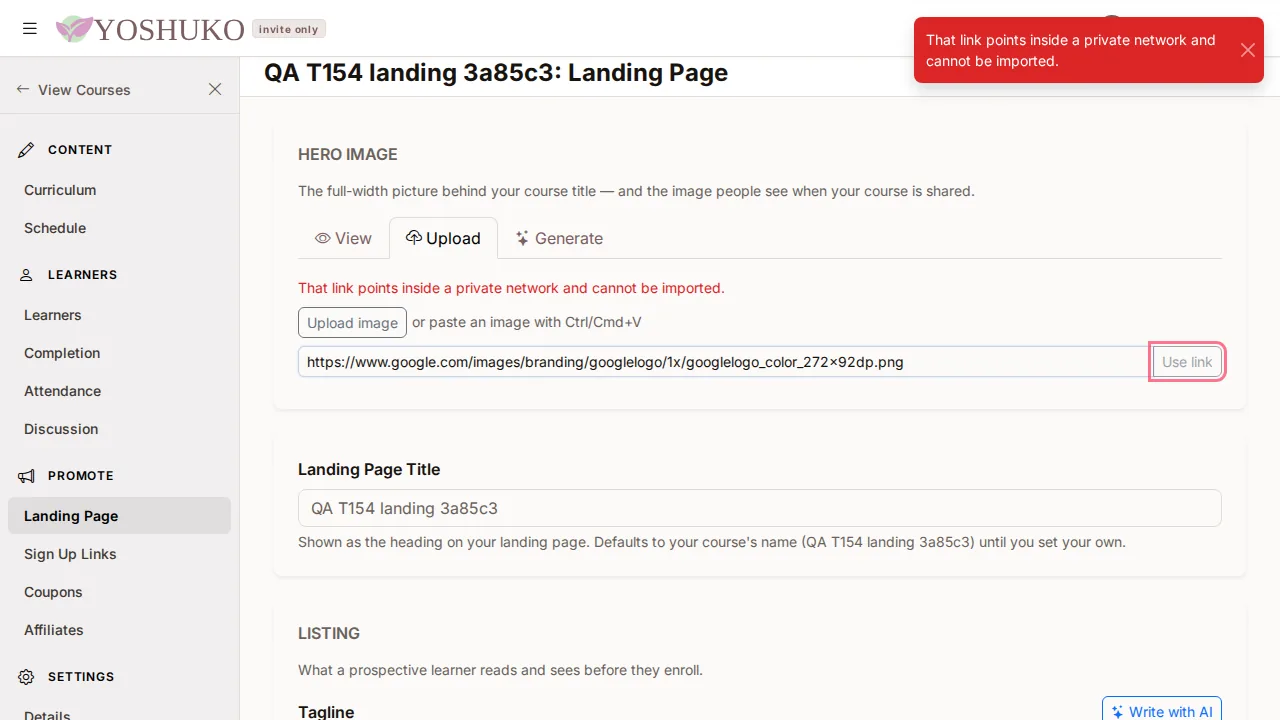
Press Upload image (PNG, JPEG, WebP or GIF) — or paste an image with Ctrl/Cmd+V, or paste an image link and press Use link.
-
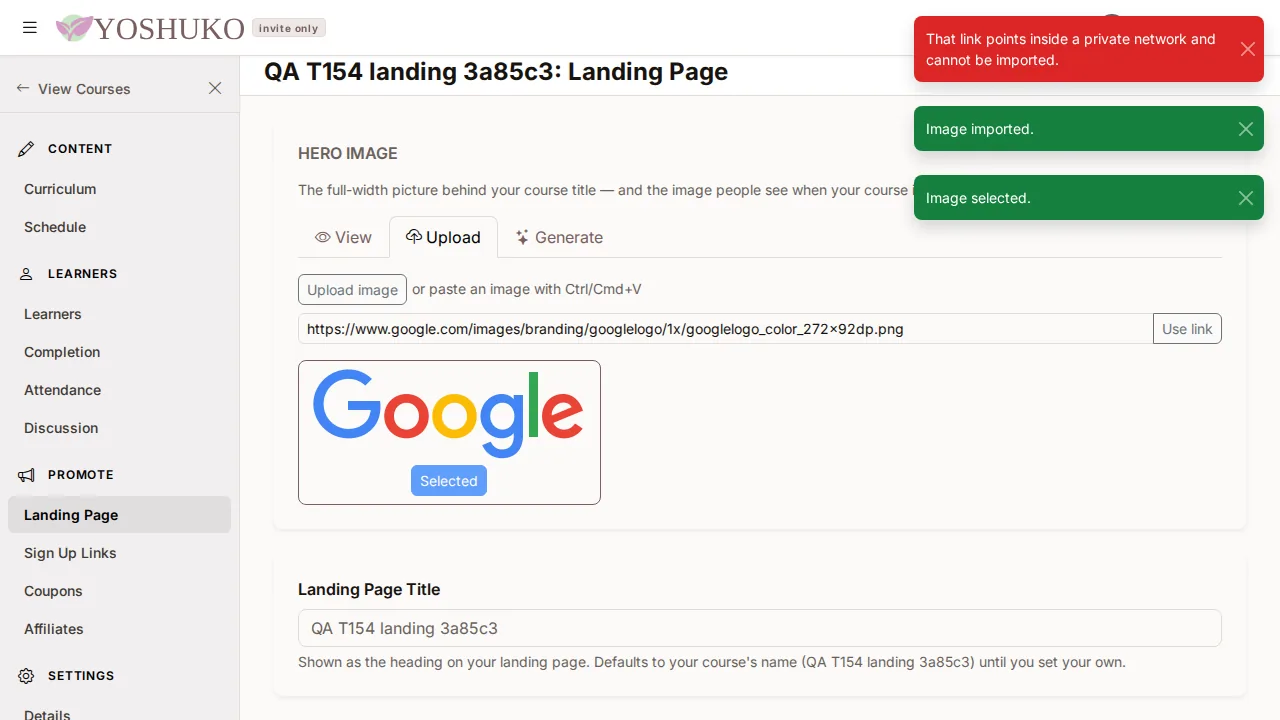
Press Use this one on the picture you want.
-
Choose the View tab to check it: the picture shows under "This is live on your landing page." Until you choose one, the card says "No hero image yet — your landing page will use a plain background." More on the landing page is in Course listing.
Automate this
Lessons, including their content, can also be created and edited with an API key. See Build a course with the API.
If something goes wrong
| You see | What it means | What to do |
|---|---|---|
| "This lesson closes before it opens. Check the days and times." | The closing day or time is earlier than the opening one. Nothing was saved. | Correct the Opens or Closes day and press Save Changes again. |
| "Enter the day this opens (day 1 or later)." (or closes) | A day number is missing or below 1. | Enter day 1 or later. |
| A warning on the Upload tab with an Add storage button | The file is bigger than the storage you have left. | Buy more storage, or free up space. |
| "Someone else changed that lesson's dates. The grid has been refreshed." | Another change to that lesson landed while you had the Schedule page open. | Check the refreshed dates and make your change again if you still need it. |