Enrol learners and cohorts
Get learners onto a course: hand out a sign-up code they use themselves, or import your whole class from a spreadsheet in one go. Then group them into cohorts. Importing a class takes about five minutes.
Before you start
- You need to be a creator on the course.
- A course people sign up to with a code should be published first.
See who is on a course
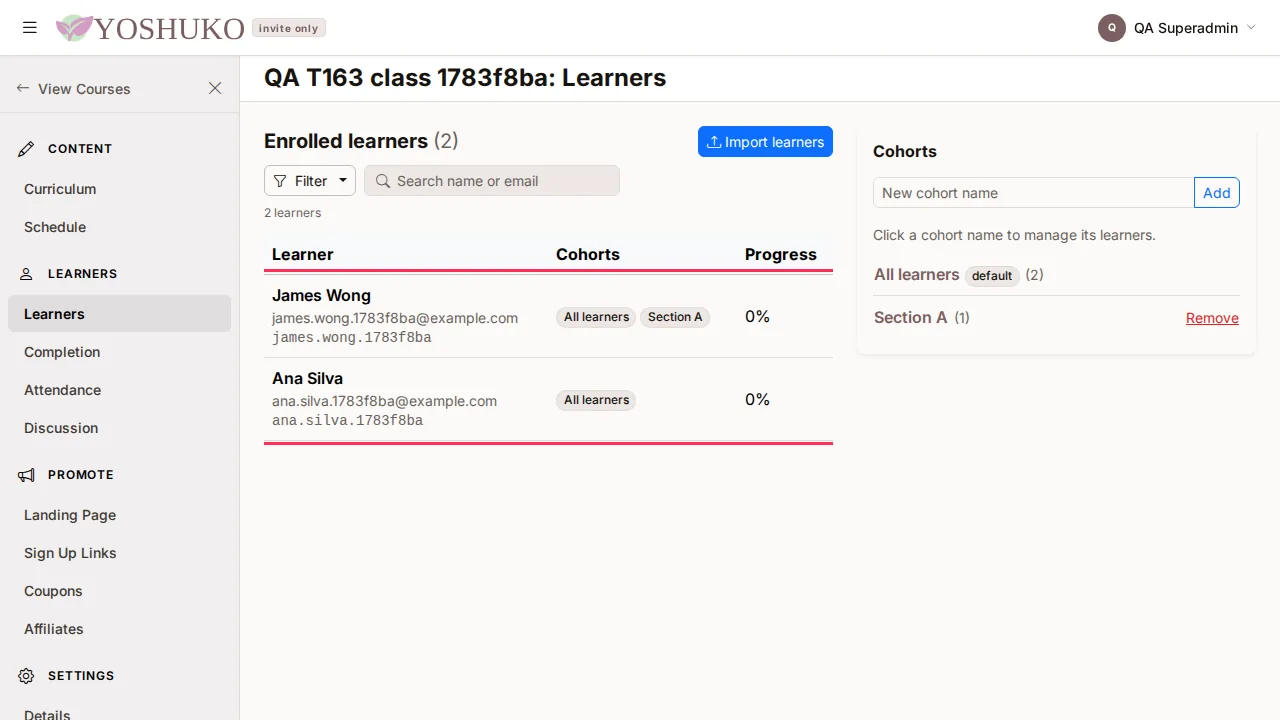
Open the course and, in the course menu under Learners, choose Learners.
Enrolled learners lists everyone on the course, with their Cohorts and Progress. Use Search name or email or the filter to find someone.
Let learners join with a sign-up code
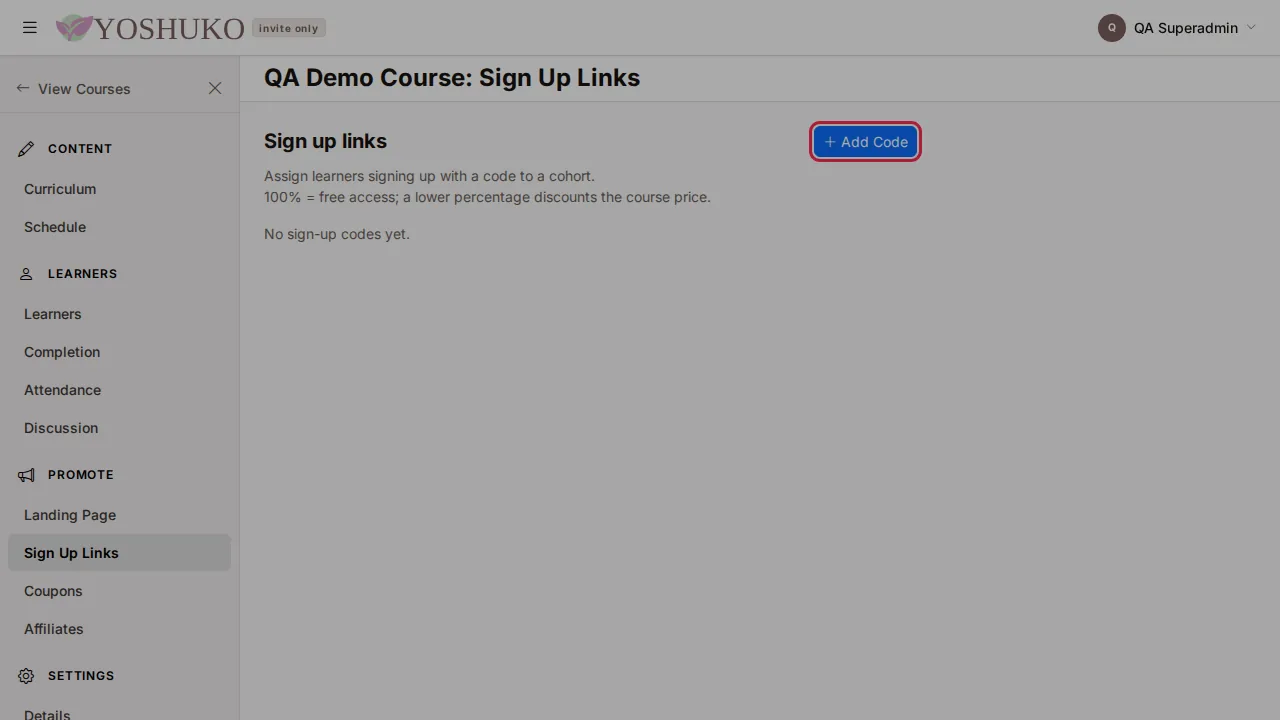
- In the course menu under Promote, choose Sign Up Links.
- Press Add Code.
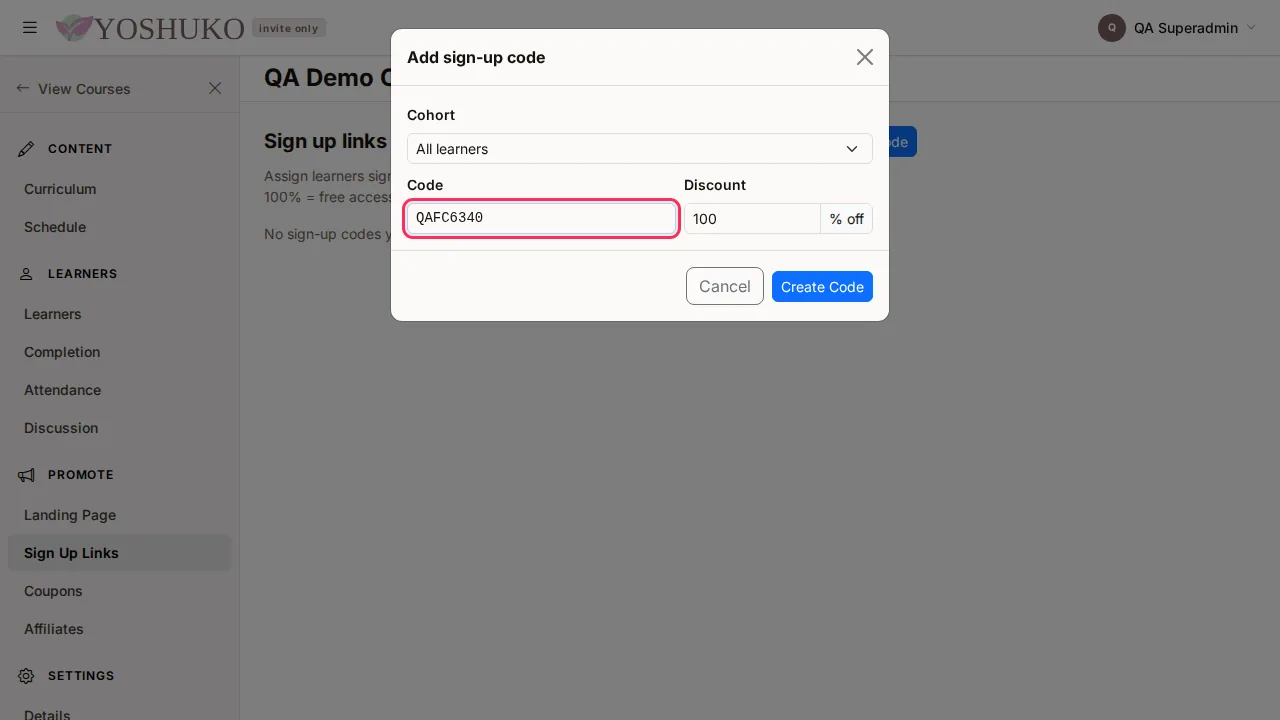
- In Add sign-up code, fill in:
- Cohort — the cohort learners who use this code join.
- Code — type your own, or leave it blank and Yoshuko makes one up.
- Discount — a percentage off. 100% gives free access; a lower percentage discounts the course price.
- Press Create Code.
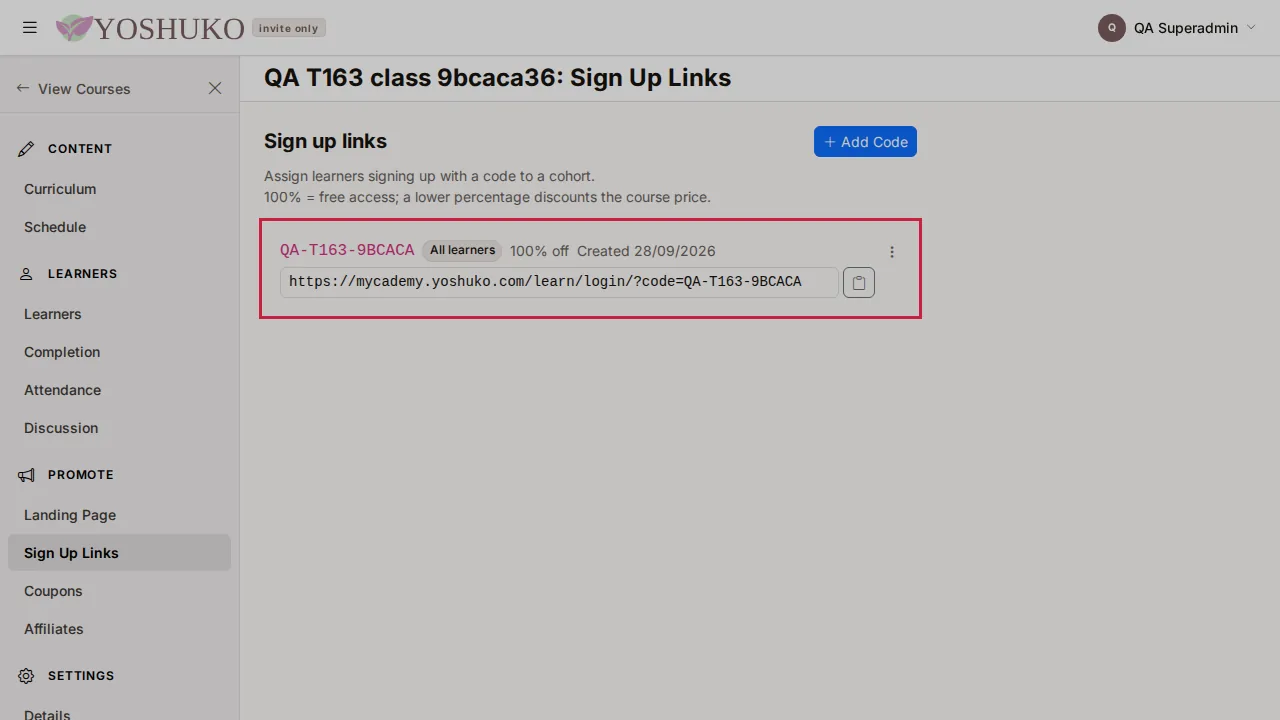
The code appears in the list with its own sign-up link. Press the copy button beside the link to copy it, and send it to your learners. To withdraw a code, open its ⋮ menu and choose Delete.
Import a whole class from a spreadsheet
Learners you import get an account and free access to the course.
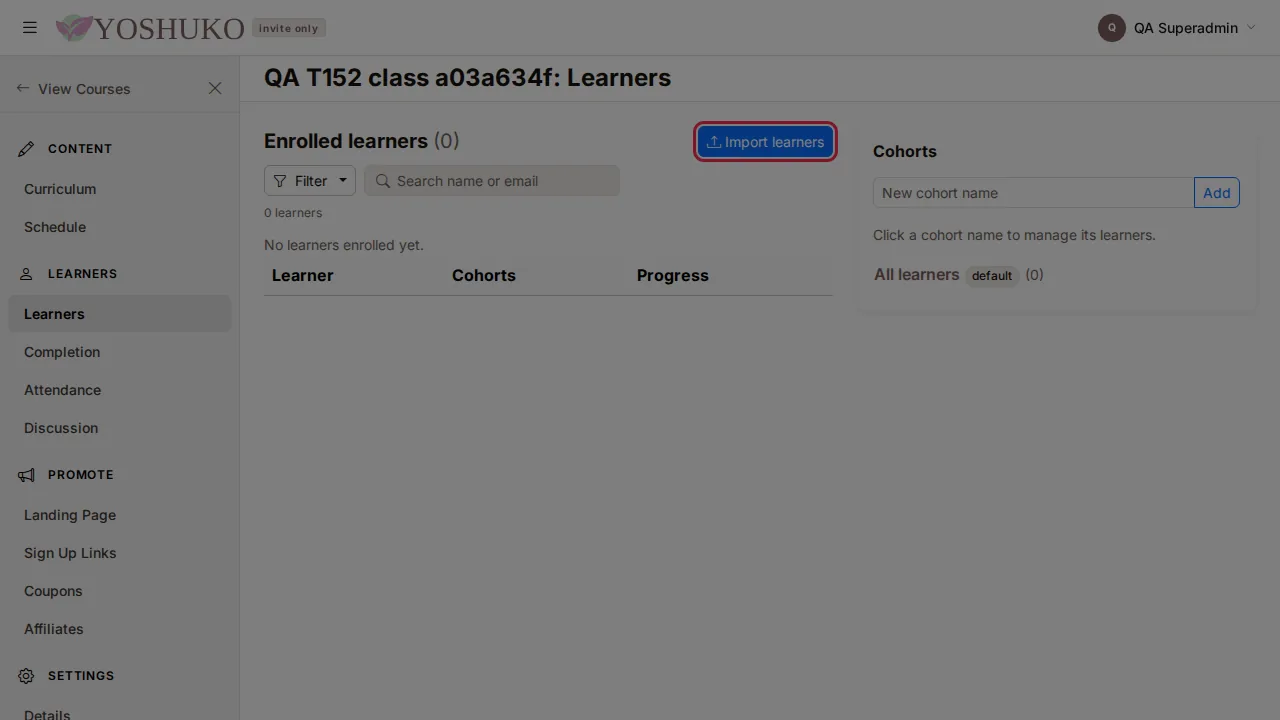
- On the Learners screen, press Import learners.
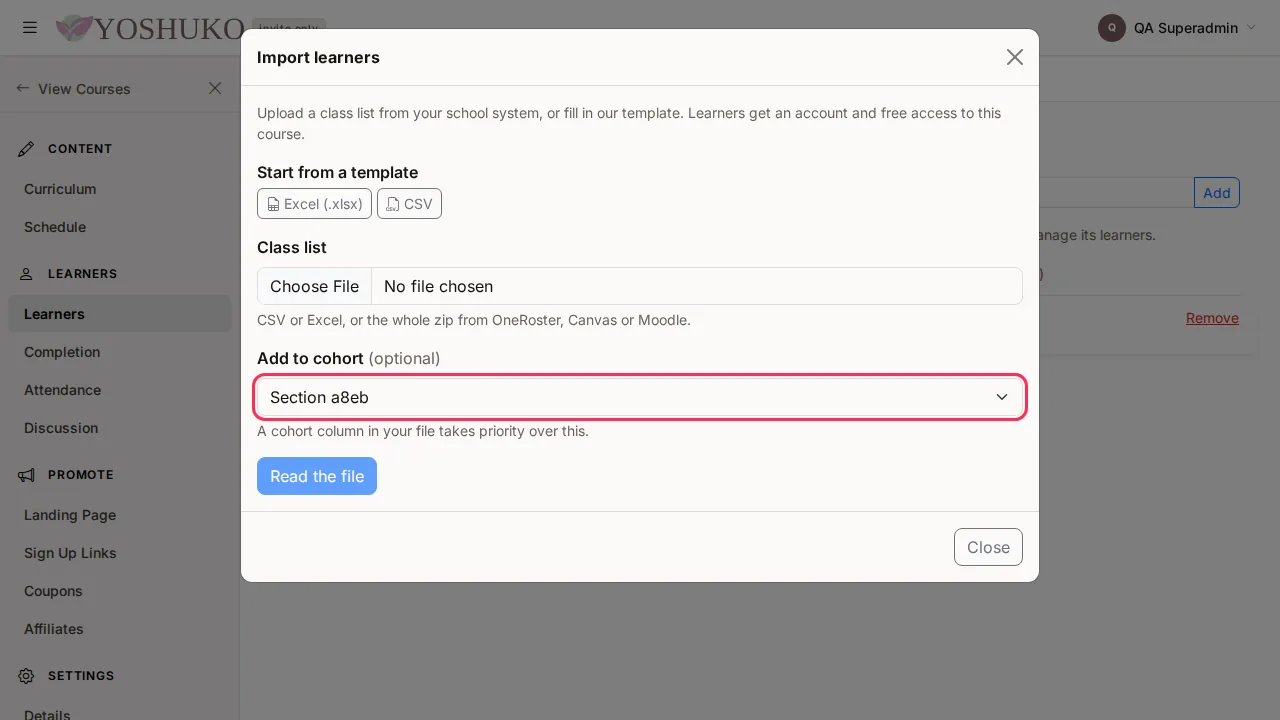
- If you do not already have a class list, download a template under Start from a template: Excel (.xlsx) or CSV.
- Under Class list, choose your file.
- Optionally, choose a cohort under Add to cohort. Leave it at All learners only to add nobody to a cohort. A cohort column in your file takes priority over this.
- Press Read the file.
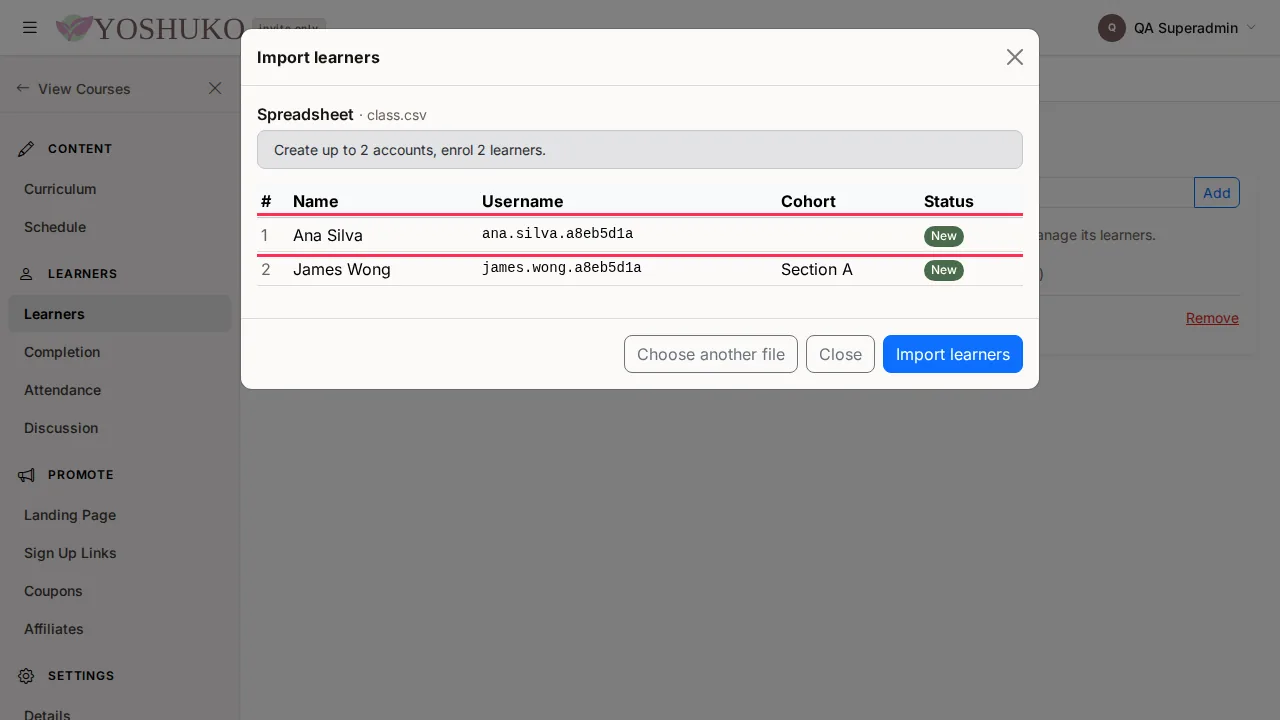
- Check the preview. It shows one row per learner — Name, Username, Cohort and Status — so you can compare it with your own list. Each row's status is New, Already enrolled, Check this or Skipped.
- If it is not right, press Choose another file. If it is, press Import learners.
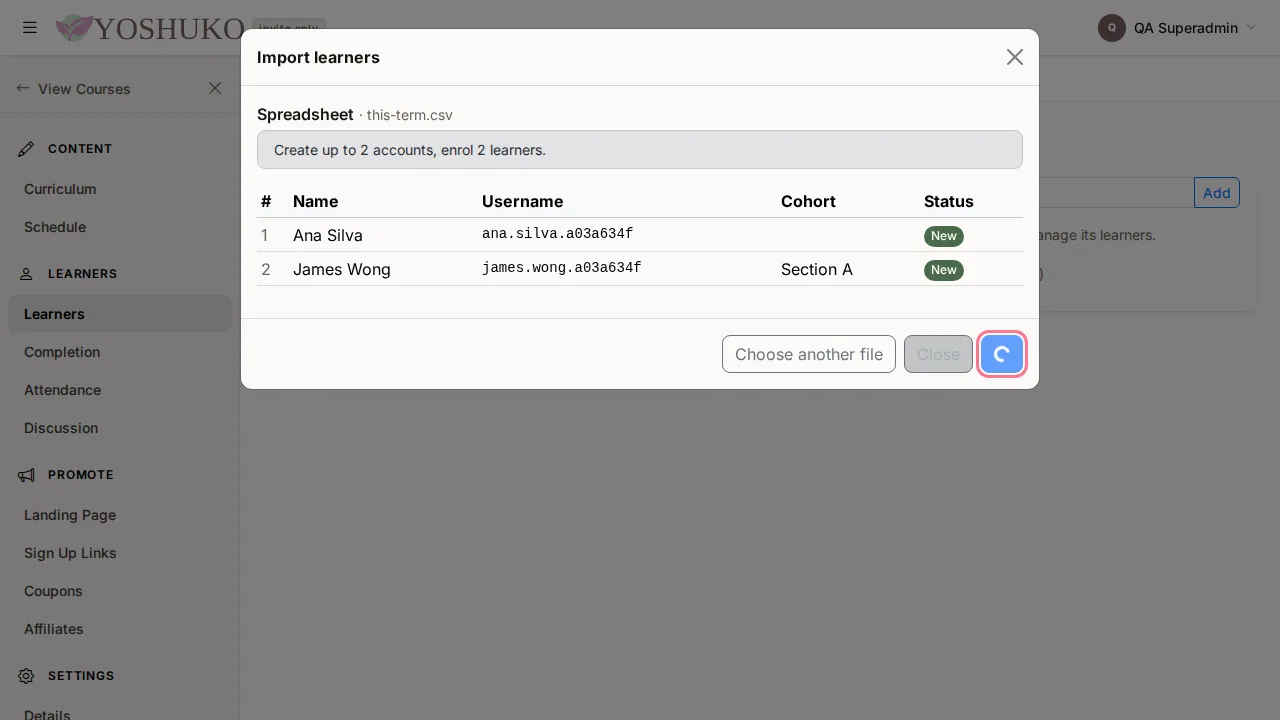
- Press Download sign-in slips. You get one page per learner with their username and a one-time password. They choose their own password the first time they sign in.
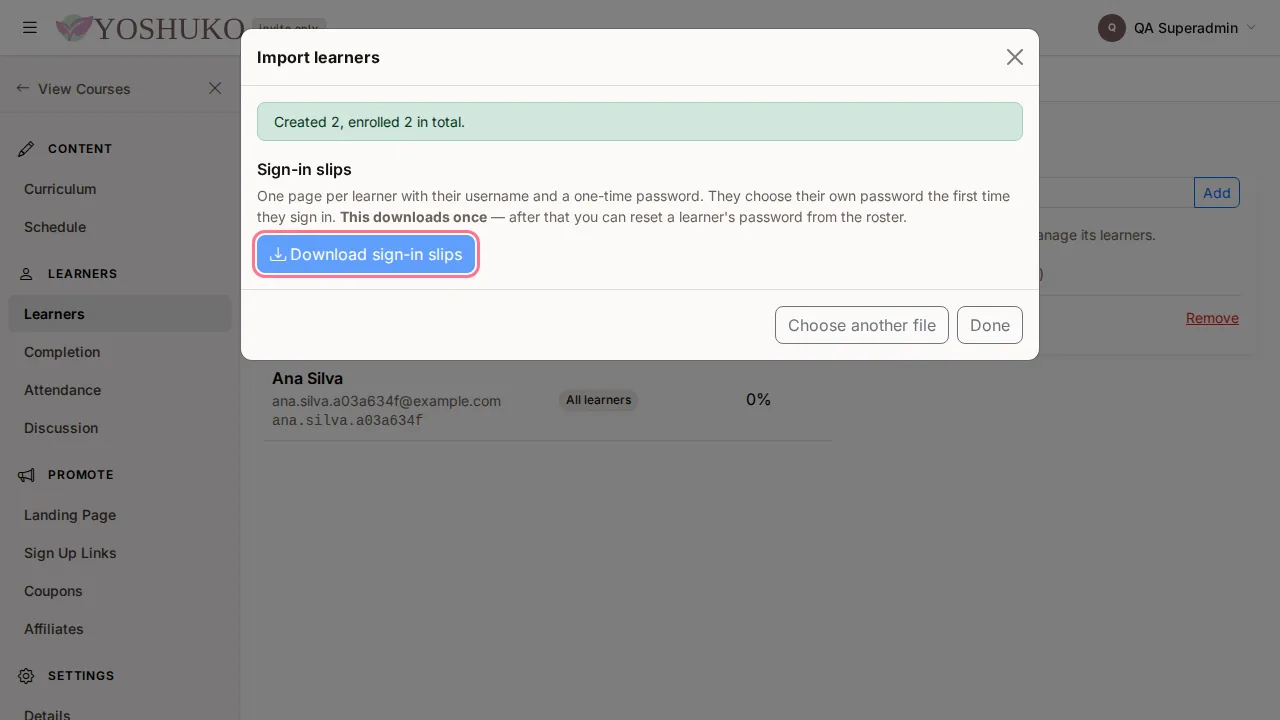
The sign-in slips download once
Download them before you close the dialog. The passwords cannot be shown again. If a learner loses their slip, reset their password from the roster (below).
Reset an imported learner's password
A learner you imported may have no email address or phone number, so they cannot reset their own password. You can give them a new one.
- On the Learners screen, find the learner and press Reset password on their row.
- Press Reset password to confirm. Their old password stops working straight away.
- Copy or write down the new username and temporary password. They are shown once. The learner chooses their own password the next time they sign in.
The Reset password button appears only for learners your organisation imported who have not verified an email address or phone number. Learners who have one reset their own password from the sign-in page.
What the file can look like
You can upload CSV or Excel (.xlsx), or the whole zip exported from OneRoster, Canvas or Moodle. Yoshuko recognises OneRoster 1.2 (CSV), Canvas SIS export (CSV) and Moodle user upload (CSV) files, and any spreadsheet with a heading row.
The template has these columns:
| Column | |
|---|---|
username |
optional — one is created from the name if you leave it blank |
email |
optional — leave it blank if learners have no email |
given_name |
required |
family_name |
required |
cohort |
optional — the group within the course |
Your own headings do not have to match exactly. For example First name, Last name, Surname, Email address, Student name, Class, Section or Period are all recognised.
Group learners into cohorts
A cohort is a group of learners within a course — a class, a section or a period.
- On the Learners screen, under Cohorts, type a New cohort name and press Add.
- Click the cohort's name to manage its learners.
- In Manage cohort, the left list is Not in cohort and the right list is In cohort. Use Search… above either list to find someone.
- Click learners to select them, then press the move button to put them in the cohort. You can also drag them between the lists.
- Press Done.
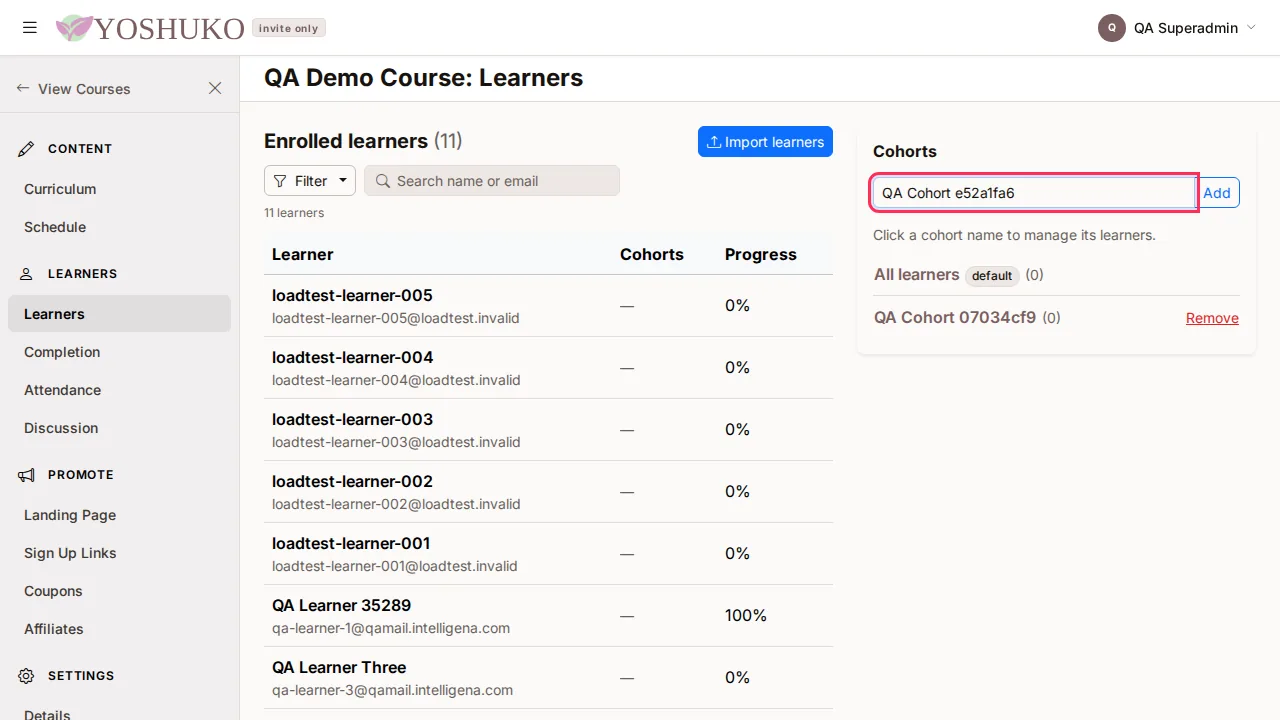
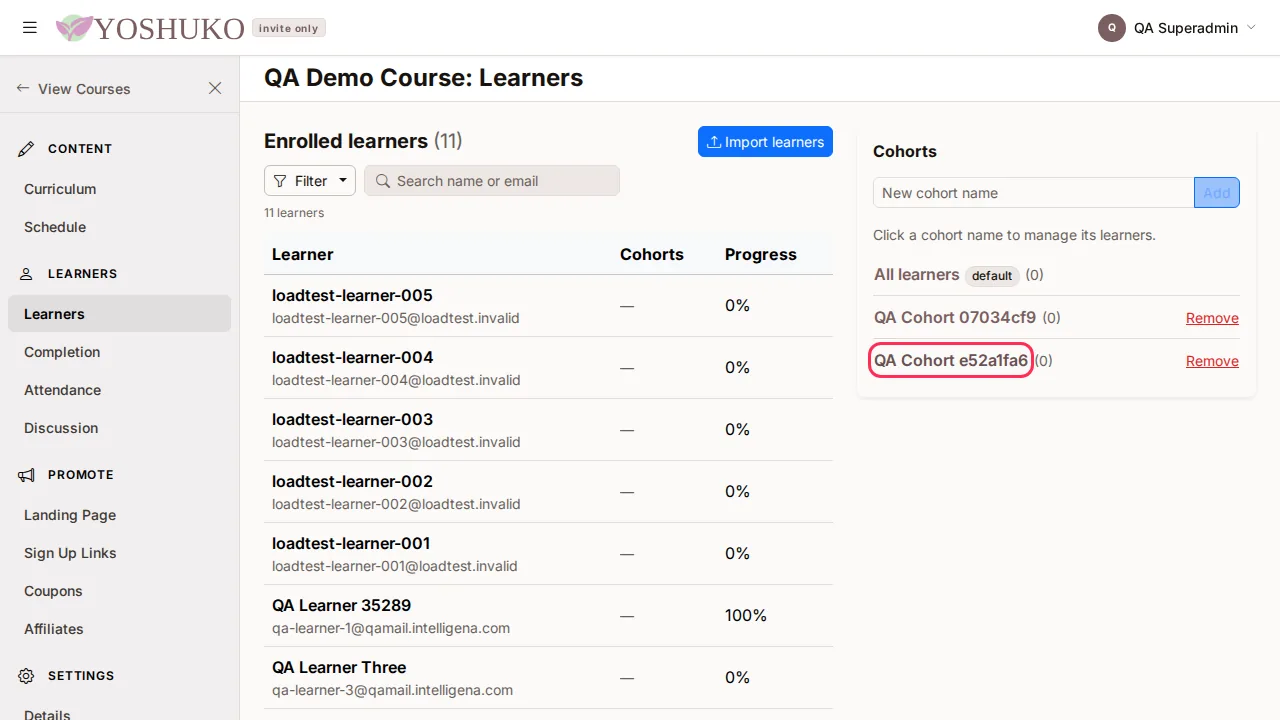
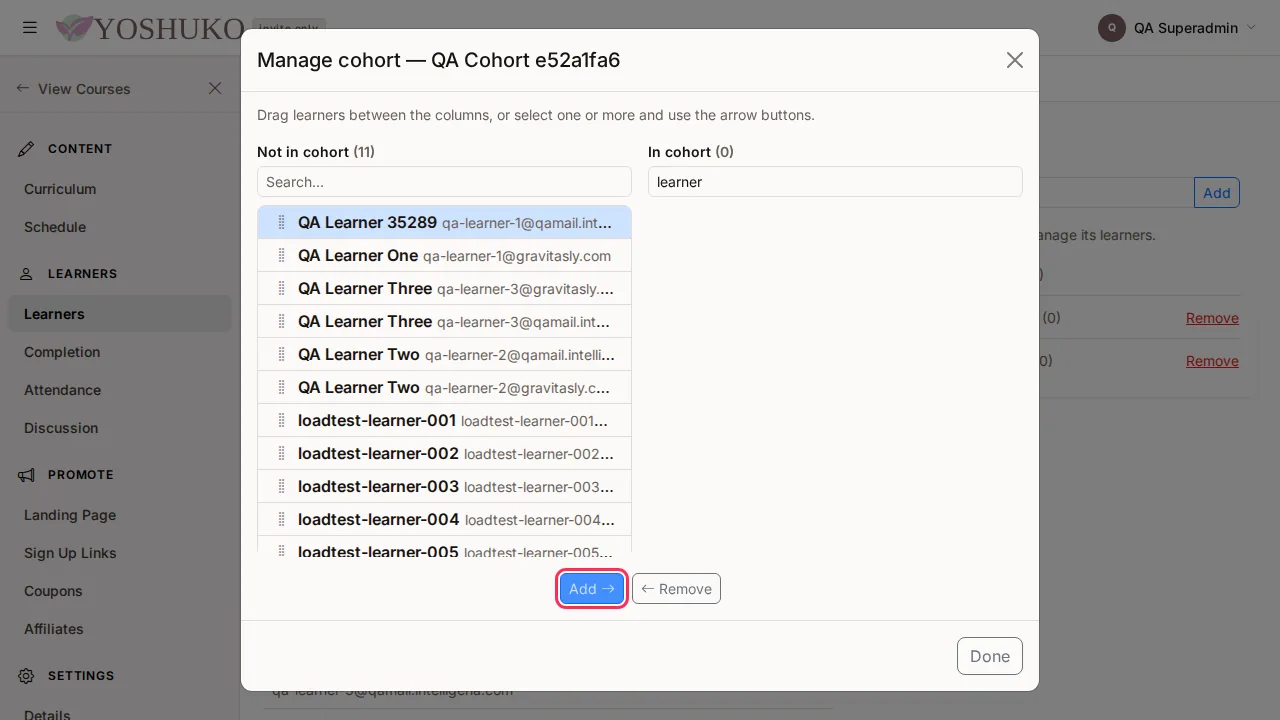
Every enrolled learner belongs to the course's default cohort automatically, so its membership cannot be edited. To delete a cohort you made, press Remove beside it.
Take a learner out of a cohort
- Click the cohort's name.
- In the In cohort list, click the learner.
- Press Remove.
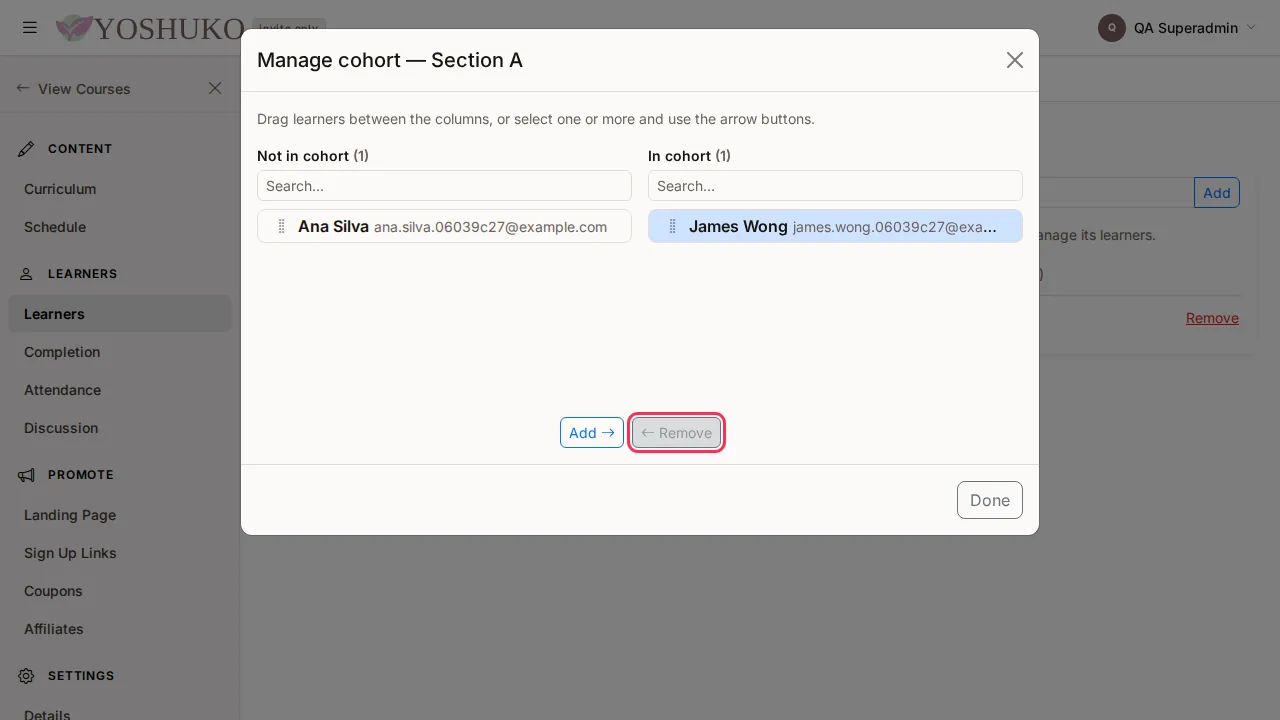
This only takes them out of the cohort. They stay enrolled on the course.
If something goes wrong
| You see | What it means | What to do |
|---|---|---|
| No learners enrolled yet. | Nobody has joined this course. | Create a sign-up code, or import your class. |
| No learners match your filters. | Your search or filter matches nobody. | Clear the search box or the filter. |
| A red message in the Import learners dialog | The file could not be read. The message says what is wrong with it. | Fix the file, or choose another, and press Read the file again. Your cohort choice is kept. |
| No learners could be read from that file. Check it has a heading row. | The file has no heading row Yoshuko can match. | Add a heading row, or start from the template. |
| A row marked Skipped or Check this | That learner cannot be imported as it stands, or needs a look. | Read the note under their name, and fix the file if needed. |