Payments, plans and coupons
To sell a course, your organisation connects a Stripe account; learners' payments go through Stripe and reach you from there. This page also covers your own Yoshuko plan, coupons for a course, and the list of purchases. Connecting Stripe takes about ten minutes, most of it on Stripe's own forms.
Before you start
- You need to be a member of the organisation in the creator studio.
- Plans and what they include are listed on the pricing page.
- Setting a course's price is covered in Your course listing.
Connect Stripe so you can be paid
- In the creator studio, choose Organization in the left-hand menu.
- In the Payments card, press Set up payments. The Payments page opens and says Your organization has not connected a Stripe account yet.
- Press Connect with Stripe. You are taken to Stripe to enter your business and bank details.
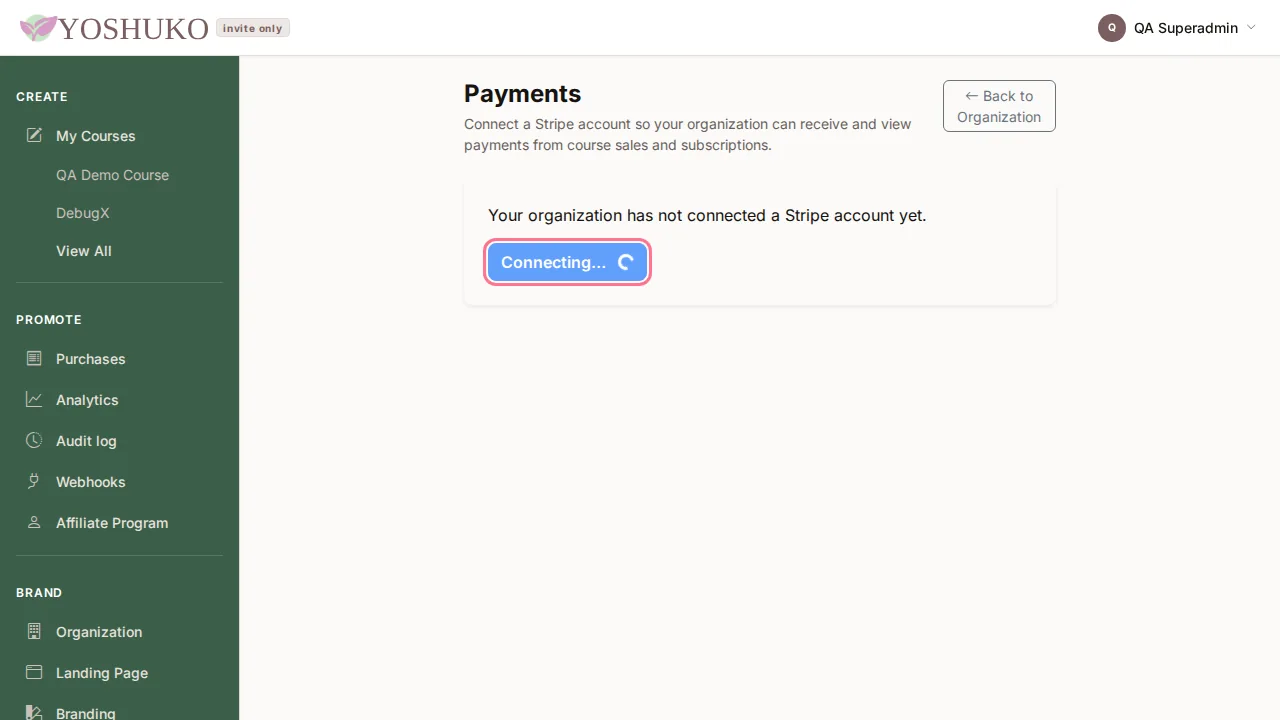
When you come back, the Payments page shows where you stand:
| The page says | What it means |
|---|---|
| Stripe still needs a few more details before your organization can accept payments. | Onboarding is not finished. Press Continue setup to go back to Stripe. |
| Your organization can accept payments. | You are ready to sell. If it adds Payouts are still being set up by Stripe., Stripe is still enabling transfers to your bank. |
You can also check this in the Yoshuko app's Stripe Connect page, which shows Charges enabled and Payouts enabled, and offers Connect Stripe account or Resume Stripe onboarding as needed.
Choose or change your Yoshuko plan
Your organisation's own plan is managed in the Yoshuko app, on the Subscription page (Manage your Yoshuko creator plan.).
- Current plan shows the plan you are on and what you pay.
- Under Available plans, press Select on the plan you want.
- Checkout opens on Stripe's secure page, where you enter your card.
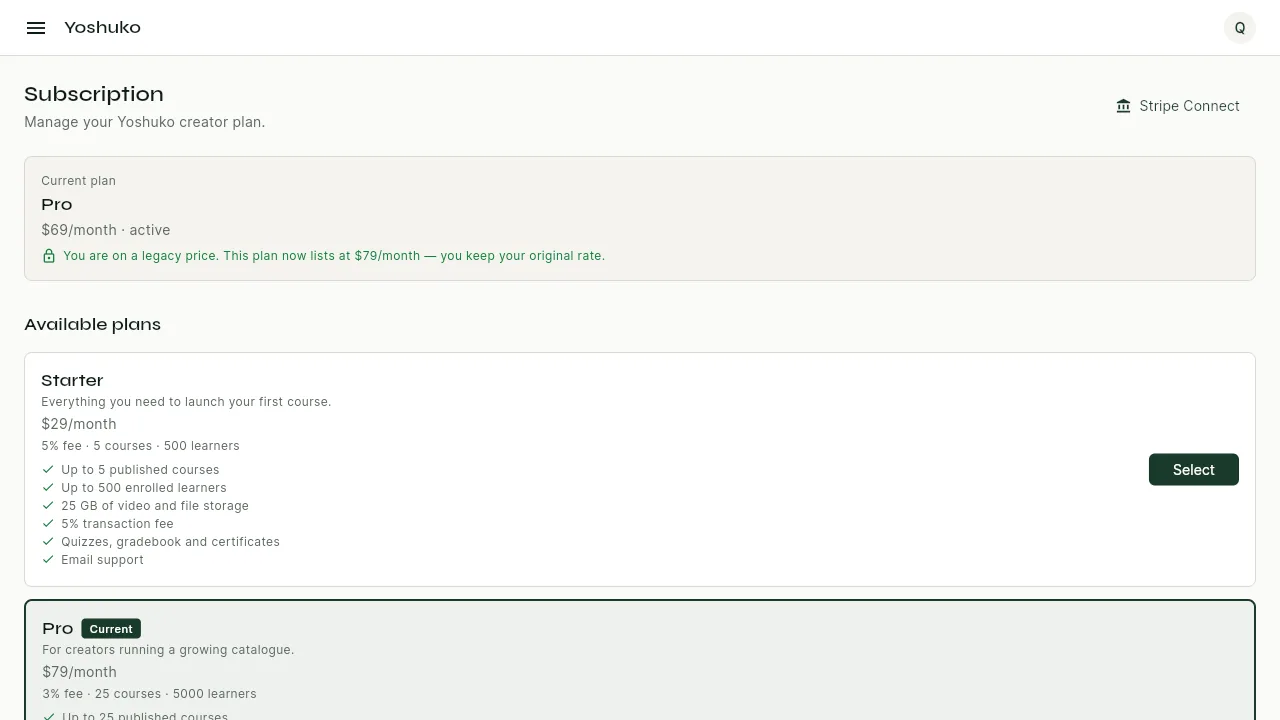
If your plan is no longer offered, the page tells you, and nothing changes: you keep your current price until you choose one of the current plans.
Create a coupon
A coupon is a code a buyer types at checkout for a percentage off one course's price. It changes what the buyer pays; it does not enrol anyone on its own (for that, use a Sign Up Link — see Enrol learners).
- Open the course. In the course menu, under Promote, choose Coupons.
- Press Add Coupon.
- Fill in:
- Code — what the buyer types, up to 32 characters, for example
SAVE20. - Discount — the percentage off, from 1 to 100.
- Max uses — optional; leave empty for unlimited.
- Expires — optional date.
- Code — what the buyer types, up to 32 characters, for example
- Press Create Coupon.
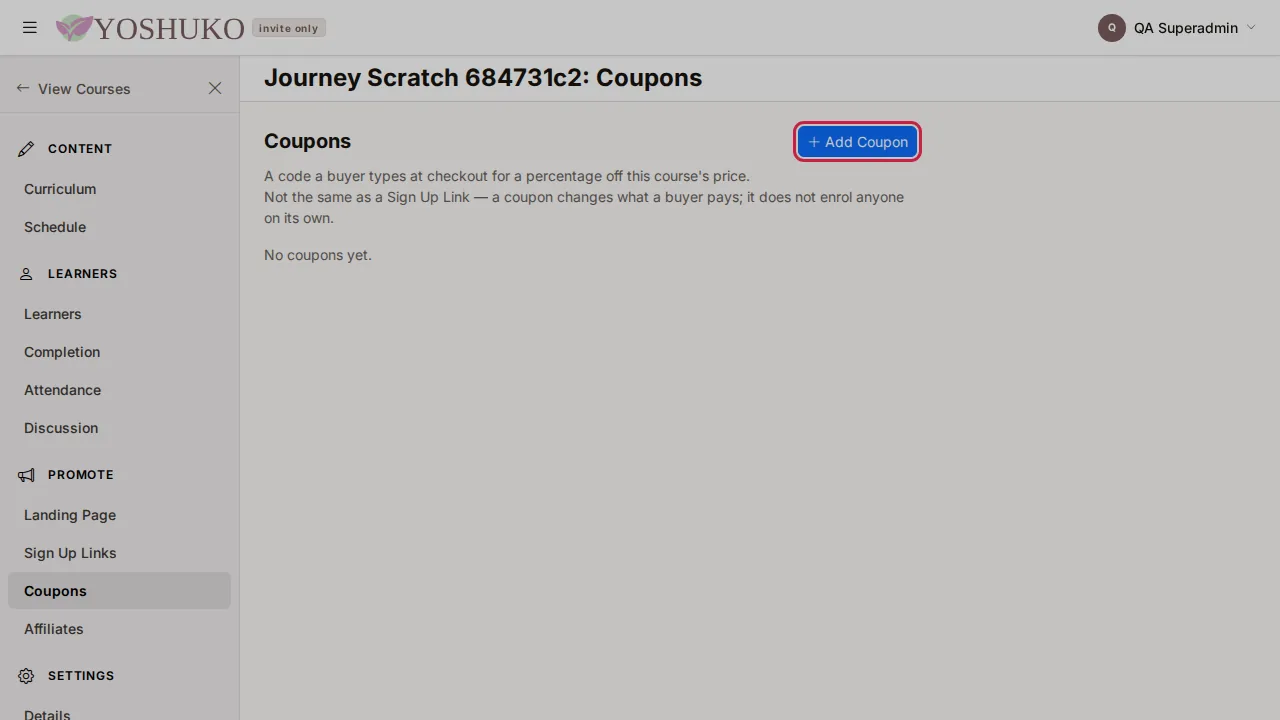
Each coupon in the list shows its code, Active or Inactive, the discount, how many times it has been used, its expiry and when it was created.
Stop a coupon
Press Deactivate on its row and confirm. Nobody can apply it at checkout after that; purchases already made with it are unaffected. A deactivated coupon stays in the list, marked Inactive.
See your purchases
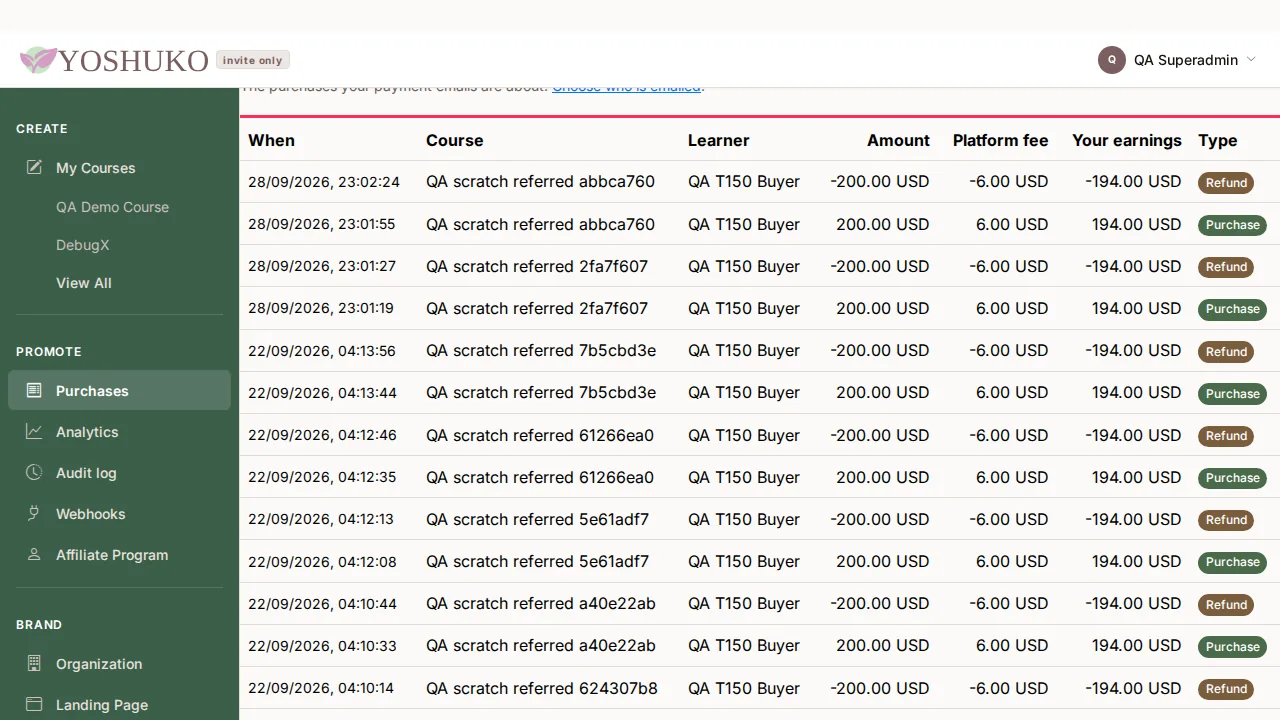
Choose Purchases in the left-hand menu. Every sale is listed newest first, with When, Course, Learner, Amount, Platform fee, Your earnings and Type. A refund appears as its own row, marked Refund, with a negative amount. Use Previous and Next to move between pages.
Choose who is emailed about payments
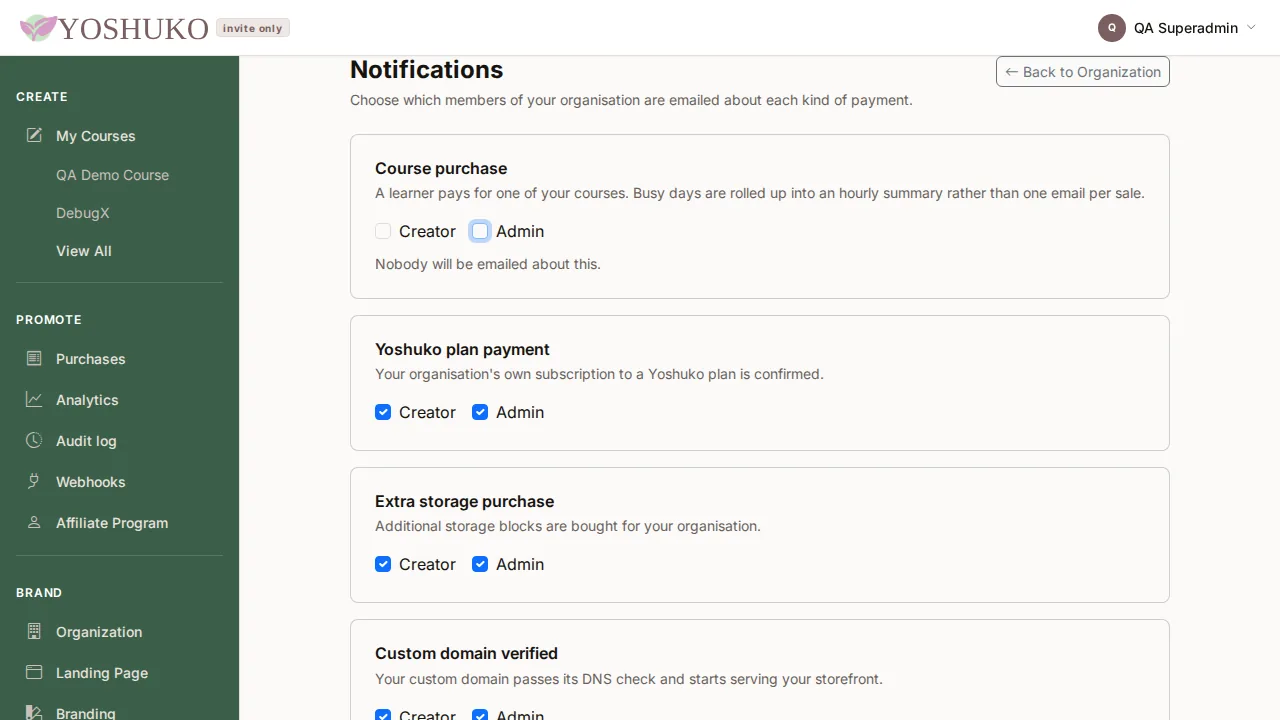
- On Organization, press Manage in the Notifications card — or press Choose who is emailed on Purchases.
-
For each event, tick the roles to email — Creator, Admin, or both:
Event When it is sent Course purchase A learner pays for one of your courses. Busy days are rolled up into a summary. Yoshuko plan payment Your organisation's own Yoshuko subscription is confirmed. Extra storage purchase Additional storage is bought for your organisation. Custom domain verified Your custom domain passes its DNS check and starts serving your storefront. -
Press Save notification settings. You see Notification settings saved.
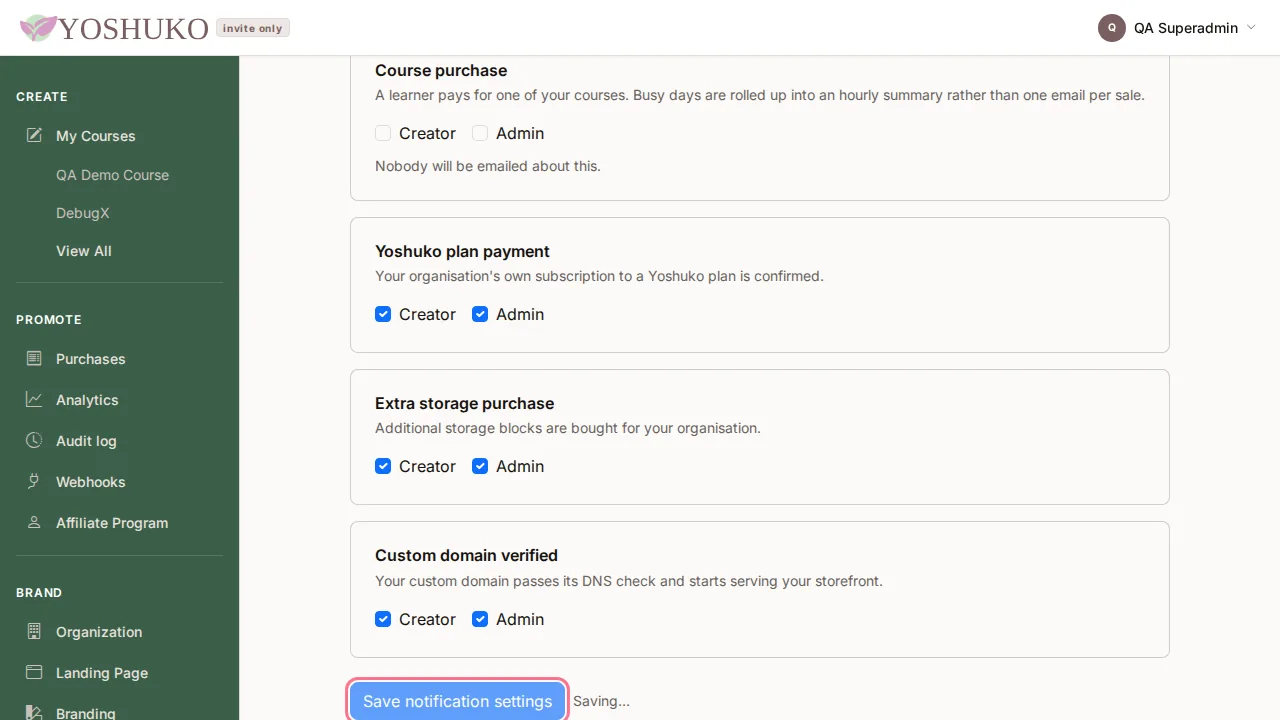
Until you change them, every event goes to both roles.
If something goes wrong
| You see | What it means | What to do |
|---|---|---|
| No purchases yet — When a learner buys one of your courses it will appear here, and we will email you about it. | Nobody has bought a course yet. Nothing is wrong. | Share your course listing or storefront. |
| Your purchases could not be loaded. | The list did not load. | Press Try again. |
| Your notification settings could not be loaded. | The settings did not load. | Press Try again. |
| Could not load your Stripe status. Reload to try again. | The Payments page could not check Stripe. | Reload the page. |
| Could not start Stripe onboarding. Please try again. | The hand-off to Stripe failed. | Press Connect with Stripe again. |
| Could not load coupons — reload to try again. | The coupon list did not load. | Reload the page. |
| Could not open the secure checkout page. Please try again. | Plan checkout could not start. | Try Select again. |